• Skip to primary navigation
  • Skip to content
  • Skip to primary sidebar
Penny Blogs

Penny Blogs

An insight into the things in life that make me smile

  • Home
  • About Penny
  • Pregnancy
  • Privacy Policy and Disclosure

Interiors

Dragging our bathrooms out of the 1980s

May 4, 2023 by Penny Leave a Comment

I promised you all an update on the house and I’m a woman to keep my promises. Although we’ve been so busy that I can’t deny it’s taken me a lot longer than I planned to get round to writing this.

Let’s start by talking about bathrooms. This house has two. A downstairs loo and then an upstairs “family bathroom” which has a bath in it, with a shower over the bath.

The Downstairs Loo

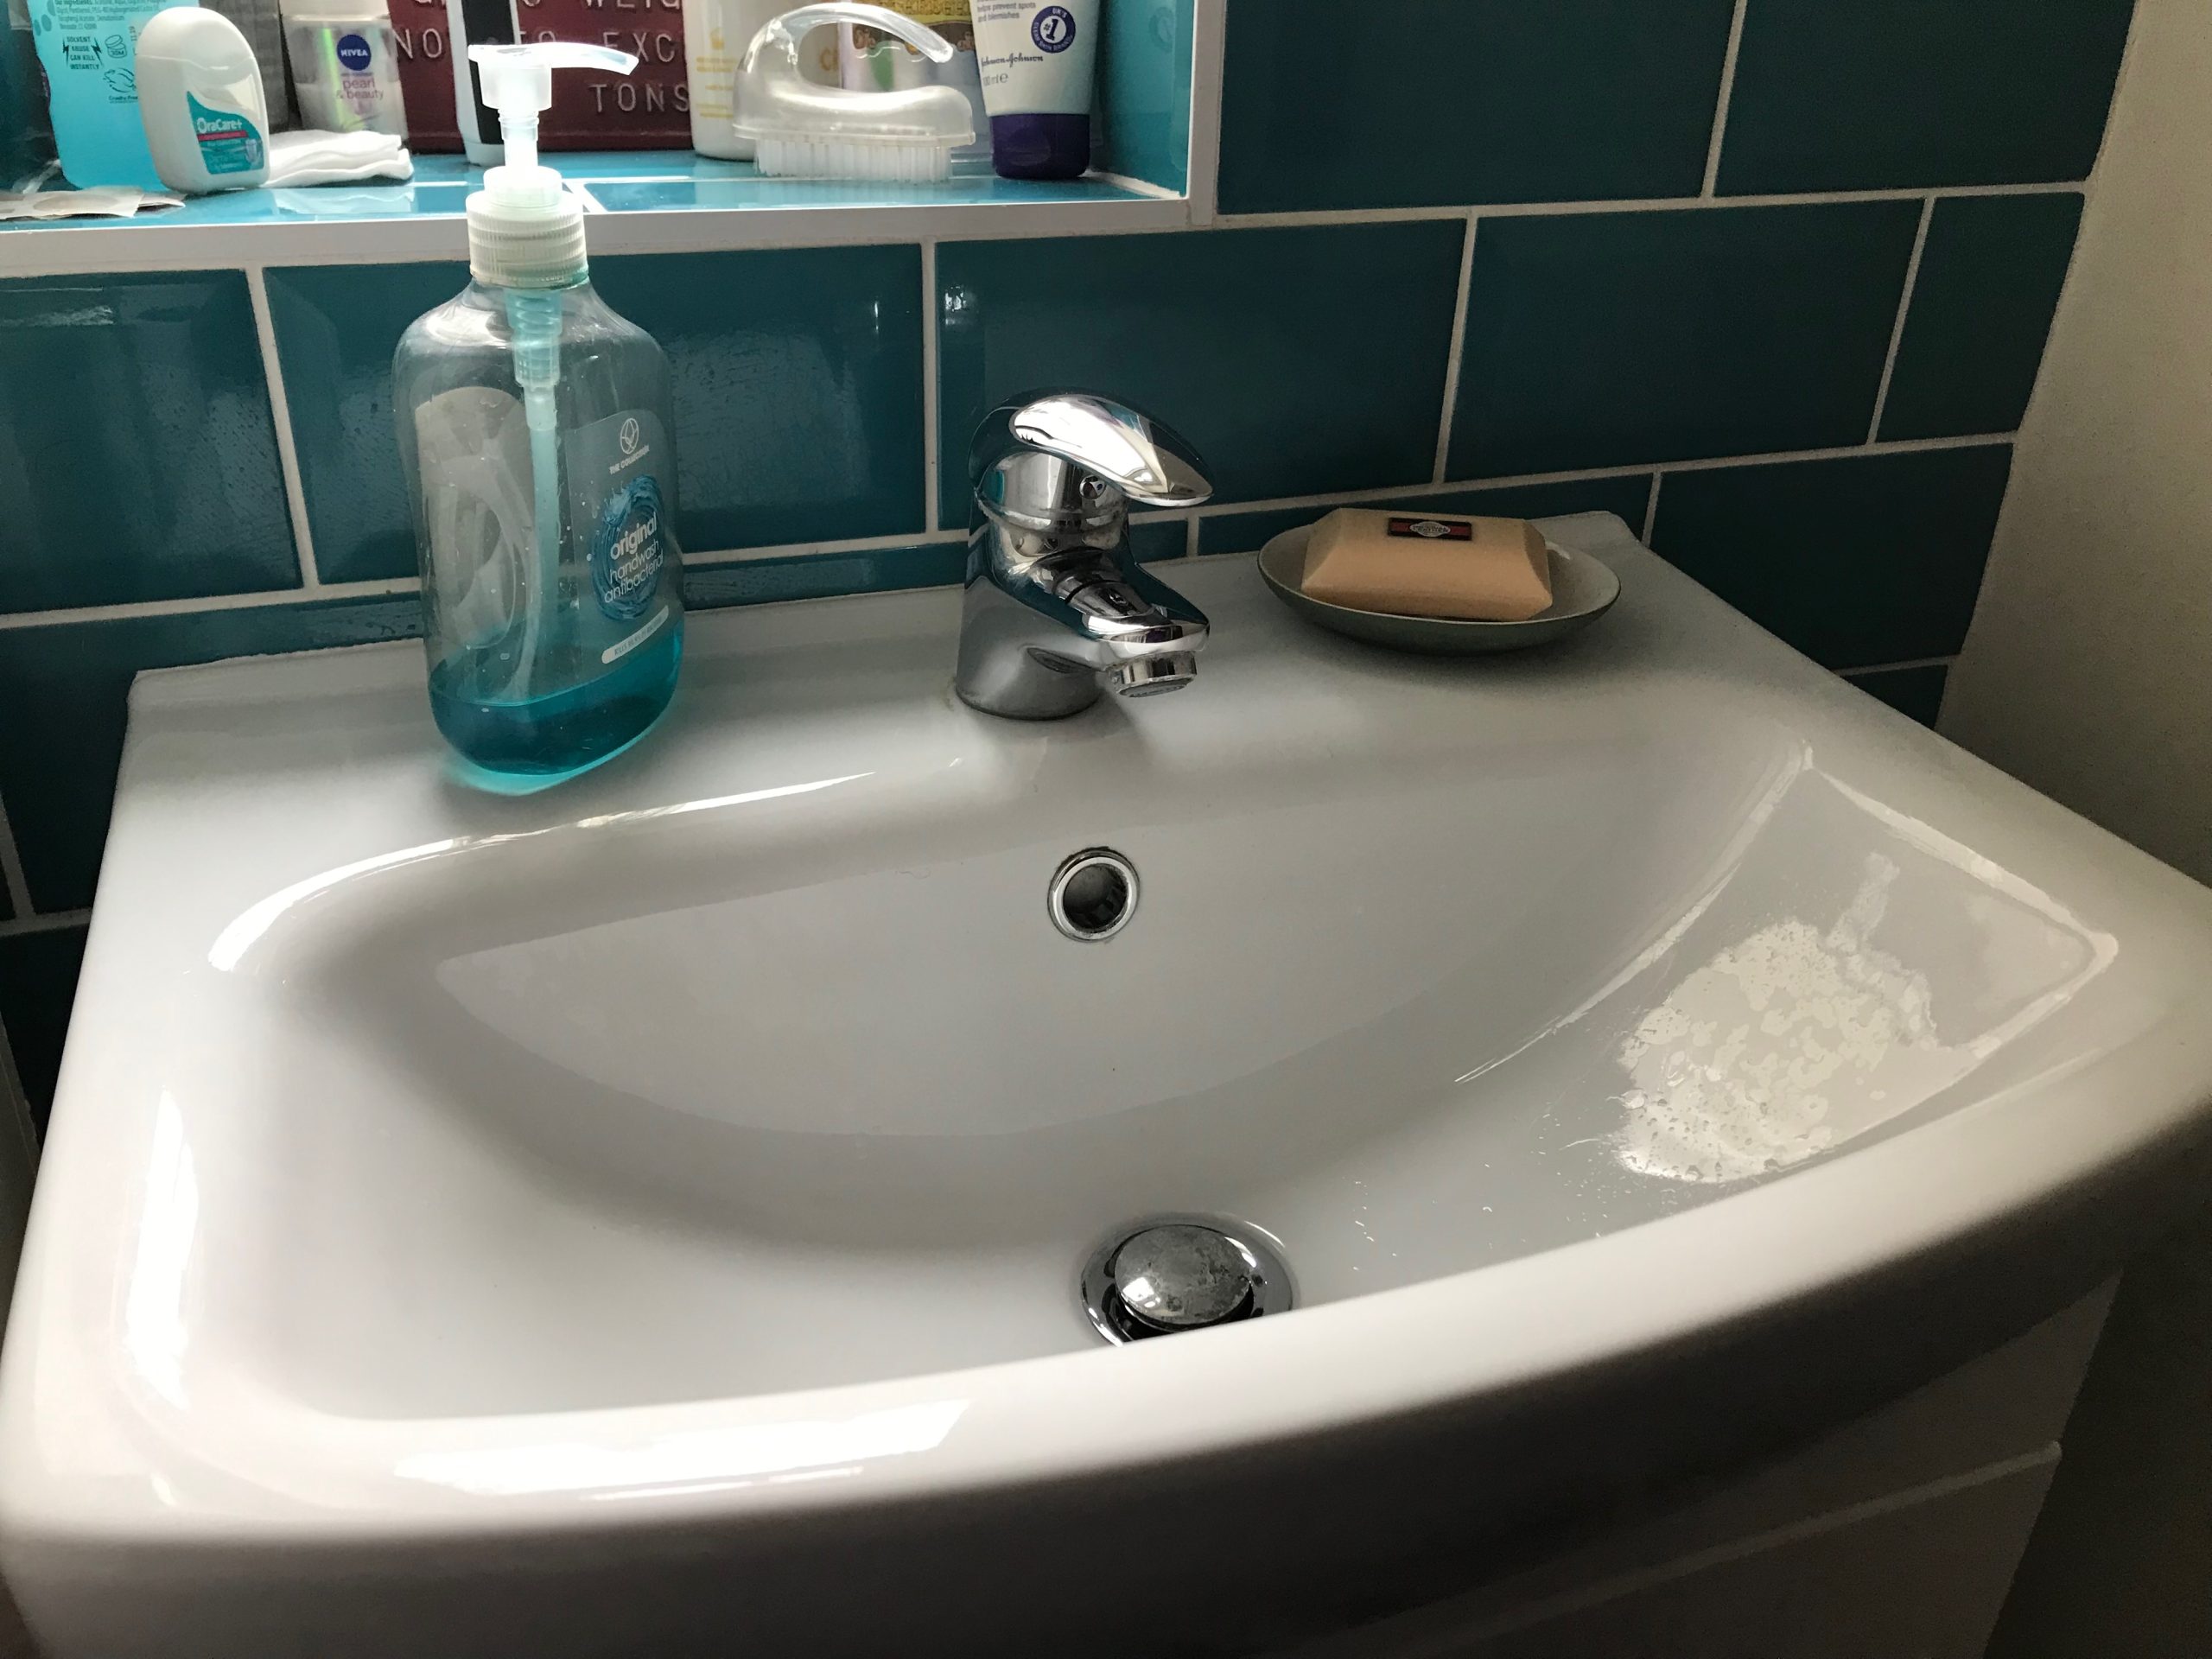
The downstairs loo was a pretty simple affair. A rectangular the room with the door on one side of it. As you go in to your left is the toilet and to your right a washbasin. The basin that we ended up having to replace unexpectedly a few years back.

A modern looking washbasin. White with a white built in cupboard underneath it. Around teh sink are some petrol blue metro style tiles.

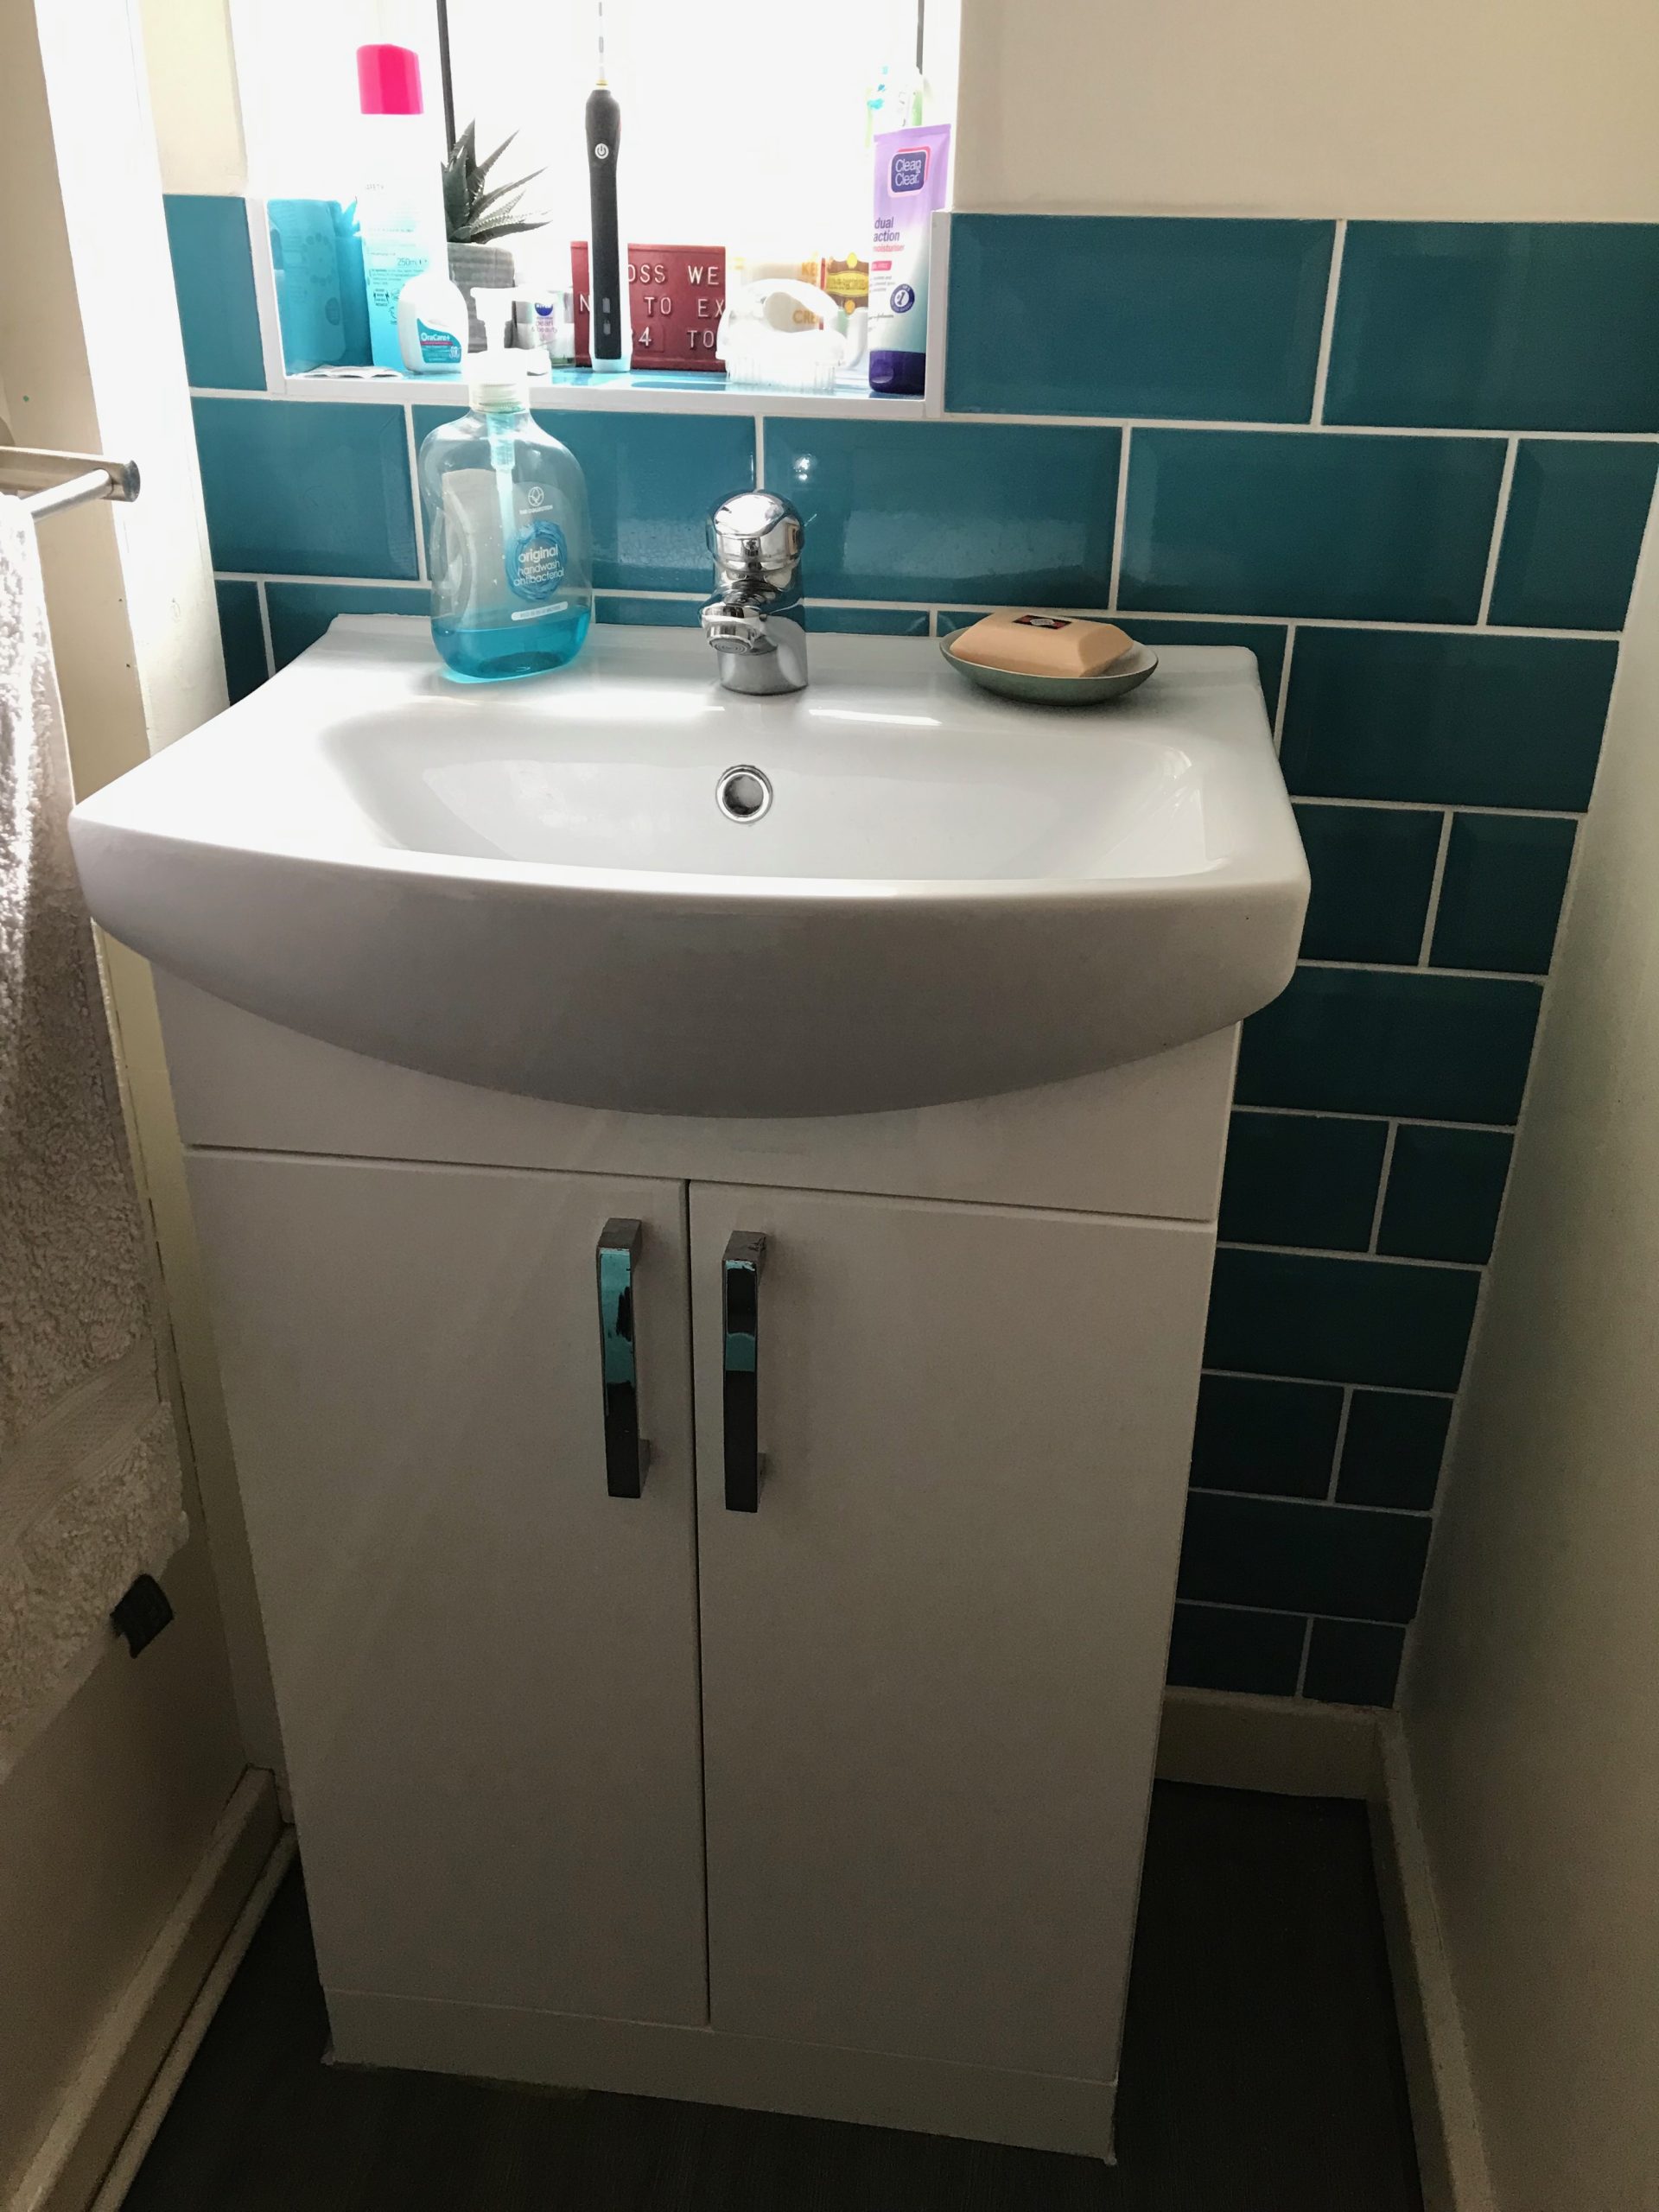
I realise that I never actually got round to sharing what we’d done in there though so this time round I actually have pictures. It’s all relatively simple with some petrol blue metro style tiles around the sink, and a built in cupboard underneath it.

A close up of a white washbasin with petrol blue metro style tiles around it.

This isn’t the most attractive room at all and with no heating in there it can also be cold, especially in winter. There’s an outside wall (which actually goes to our neighbours garage as these are link-detached houses) and a small window which looks out onto a dead bit of space to the side of our porch.

Dream plans

If money were no object what we’d like to do would be to extend out of the front of the property and a new downstairs bathroom would be part of those plans. The porch is something that the previous owner handbuilt in the 1970s and it’s an incredibly useful space for shoes, boots, coats etc, but it is just stuck on the front of the house and leaves loads of wasted space either side of it. If we could build out properly and use all this space we could enlarge the downstairs bathroom and maybe even extend the kitchen too. That is also at the front of the house sticking out somewhat from the main building. Bringing all this area together would be a large piece of work and completely transform the downstairs of the whole house, but for now budget doesn’t allow us that at all.

Practical plans

What is possibly more in budget is trying to move the toilet to the opposite end of our downstairs bathroom and try to squeeze in a shower where it currently is. We’ve done some measuring and think it should just work. A small handbasin could I think fit on the wall opposite the door (possible as the door actually opens outwards at present) and that would make it usable as a full mini-bathroom. On a practical level, as a family of five this would be so handy, especially as our eldest has a downstairs bedroom.

Now we’ve found a plumber locally that we trust (more on him in a moment) it’s much more of a possibility we just need to save up – and get the other bathroom finished.

Upstairs Family Bathroom

The upstairs bathroom was functional when we moved in so we’ve really just made do with it since then. The tiles were a pale blue with some floral bits, but the sanitary wear was just plain white. At some point the main toilet pan cracked alarmingly so we found someone to replace that with just a simple cheap unit from B&Q. It did the job, but was nothing really to write home about.

The electric shower seized up – probably due to all our hard water clogging it up – and we replaced it with a like for like one from Screwfix with B replacing it himself. It was still quite pathetic as a shower goes, but at least kept everyone clean.

Problematic layout

The bathroom layout is far from perfect. As you go in it’s a square-ish room. Immediately opposite the door is the toilet. To the right of that is a washbasin and to the right of that is the tap end of the bath. The bath is across the wall with the only window in it – at right angles to the wall with the door in it. Between the foot of the bath and the door is a small Ikea storage shelf that we’ve squeezed in. The shower is actually at the foot end of the bath.

A view of a very 80s style bathroom with pale blue floral tiles and a sad shower curtain in shot. You can see the sink and taps end of the bath and also the shelf that runs along that wall of the bathroom and also teh mirrored cabinets. Poor lighting makes not look even more miserable than it was.

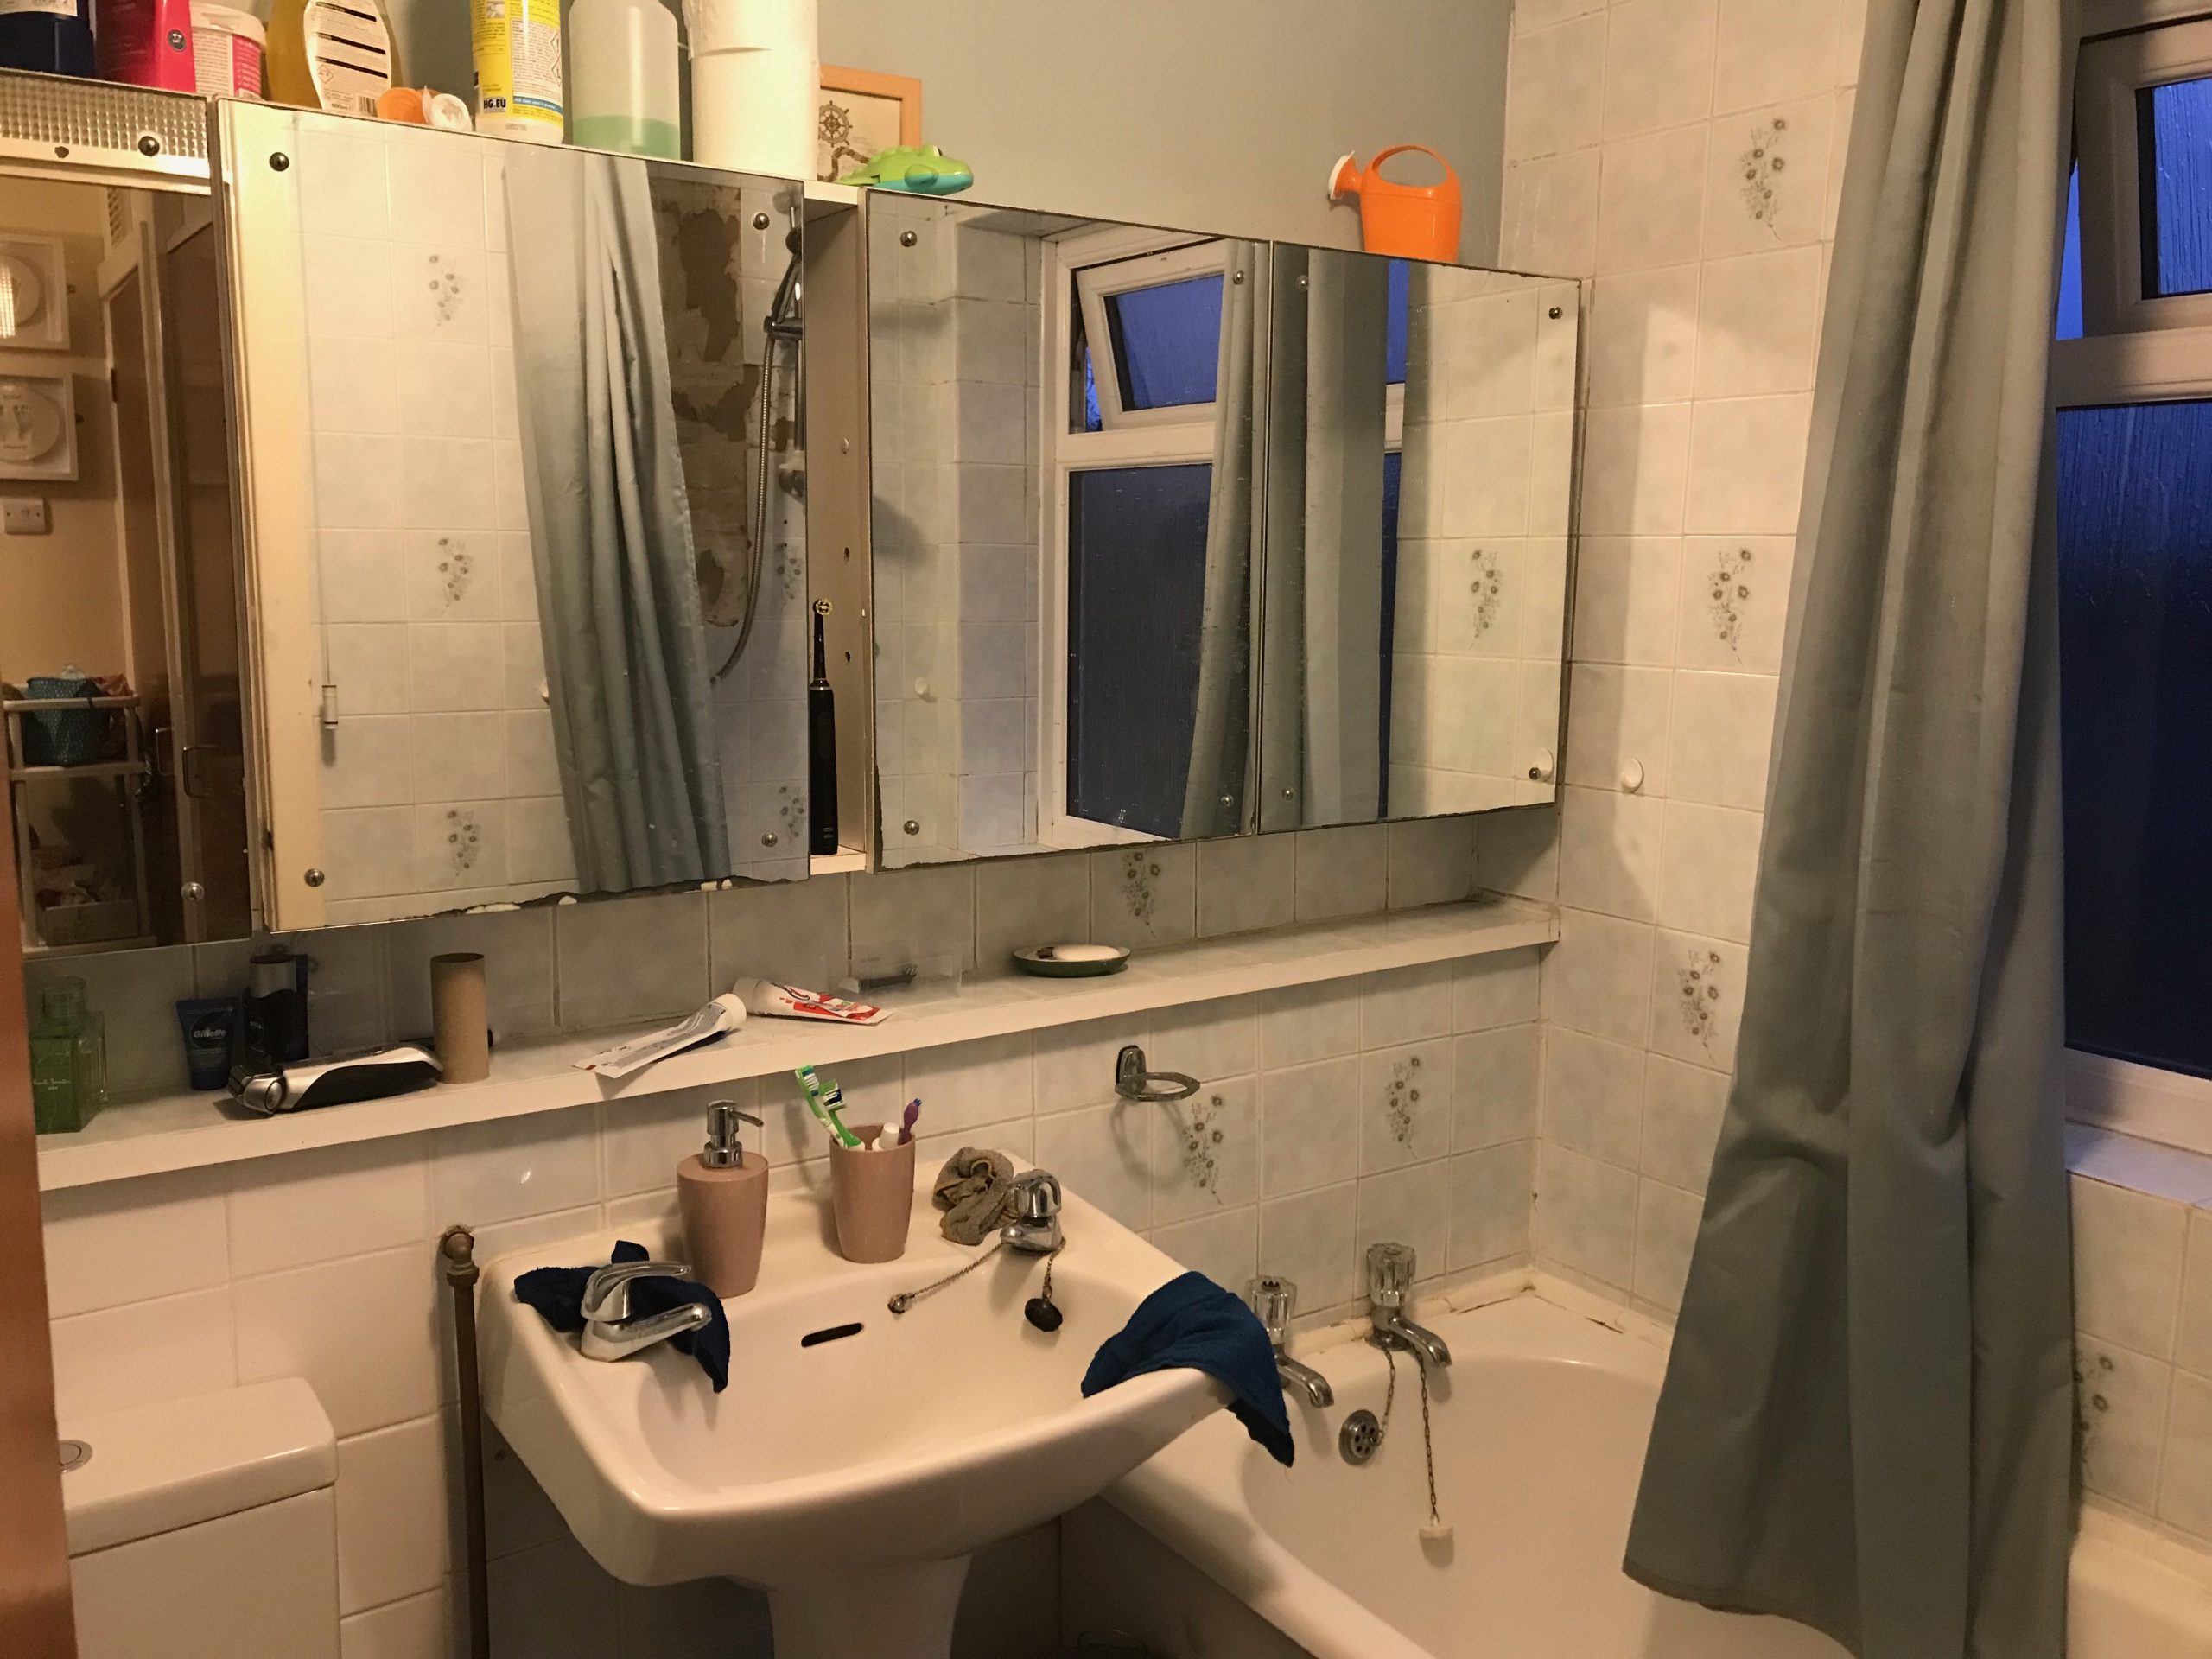
The wall with the toilet, sink and tap end of the bath on it has a built in shelf running the whole length of the wall just above all these and some of the pipework is hidden behind the wall that’s below this shelf. Higher up on the wall are some mirror fronted cupboard that the previous owner built to fit.

This layout means that you need a way of keeping the water off the bathroom window when you have a shower. At the moment we do that by having two shower curtains – one either side of the bath. Again, not perfect, but workable.

Upgrading the shower

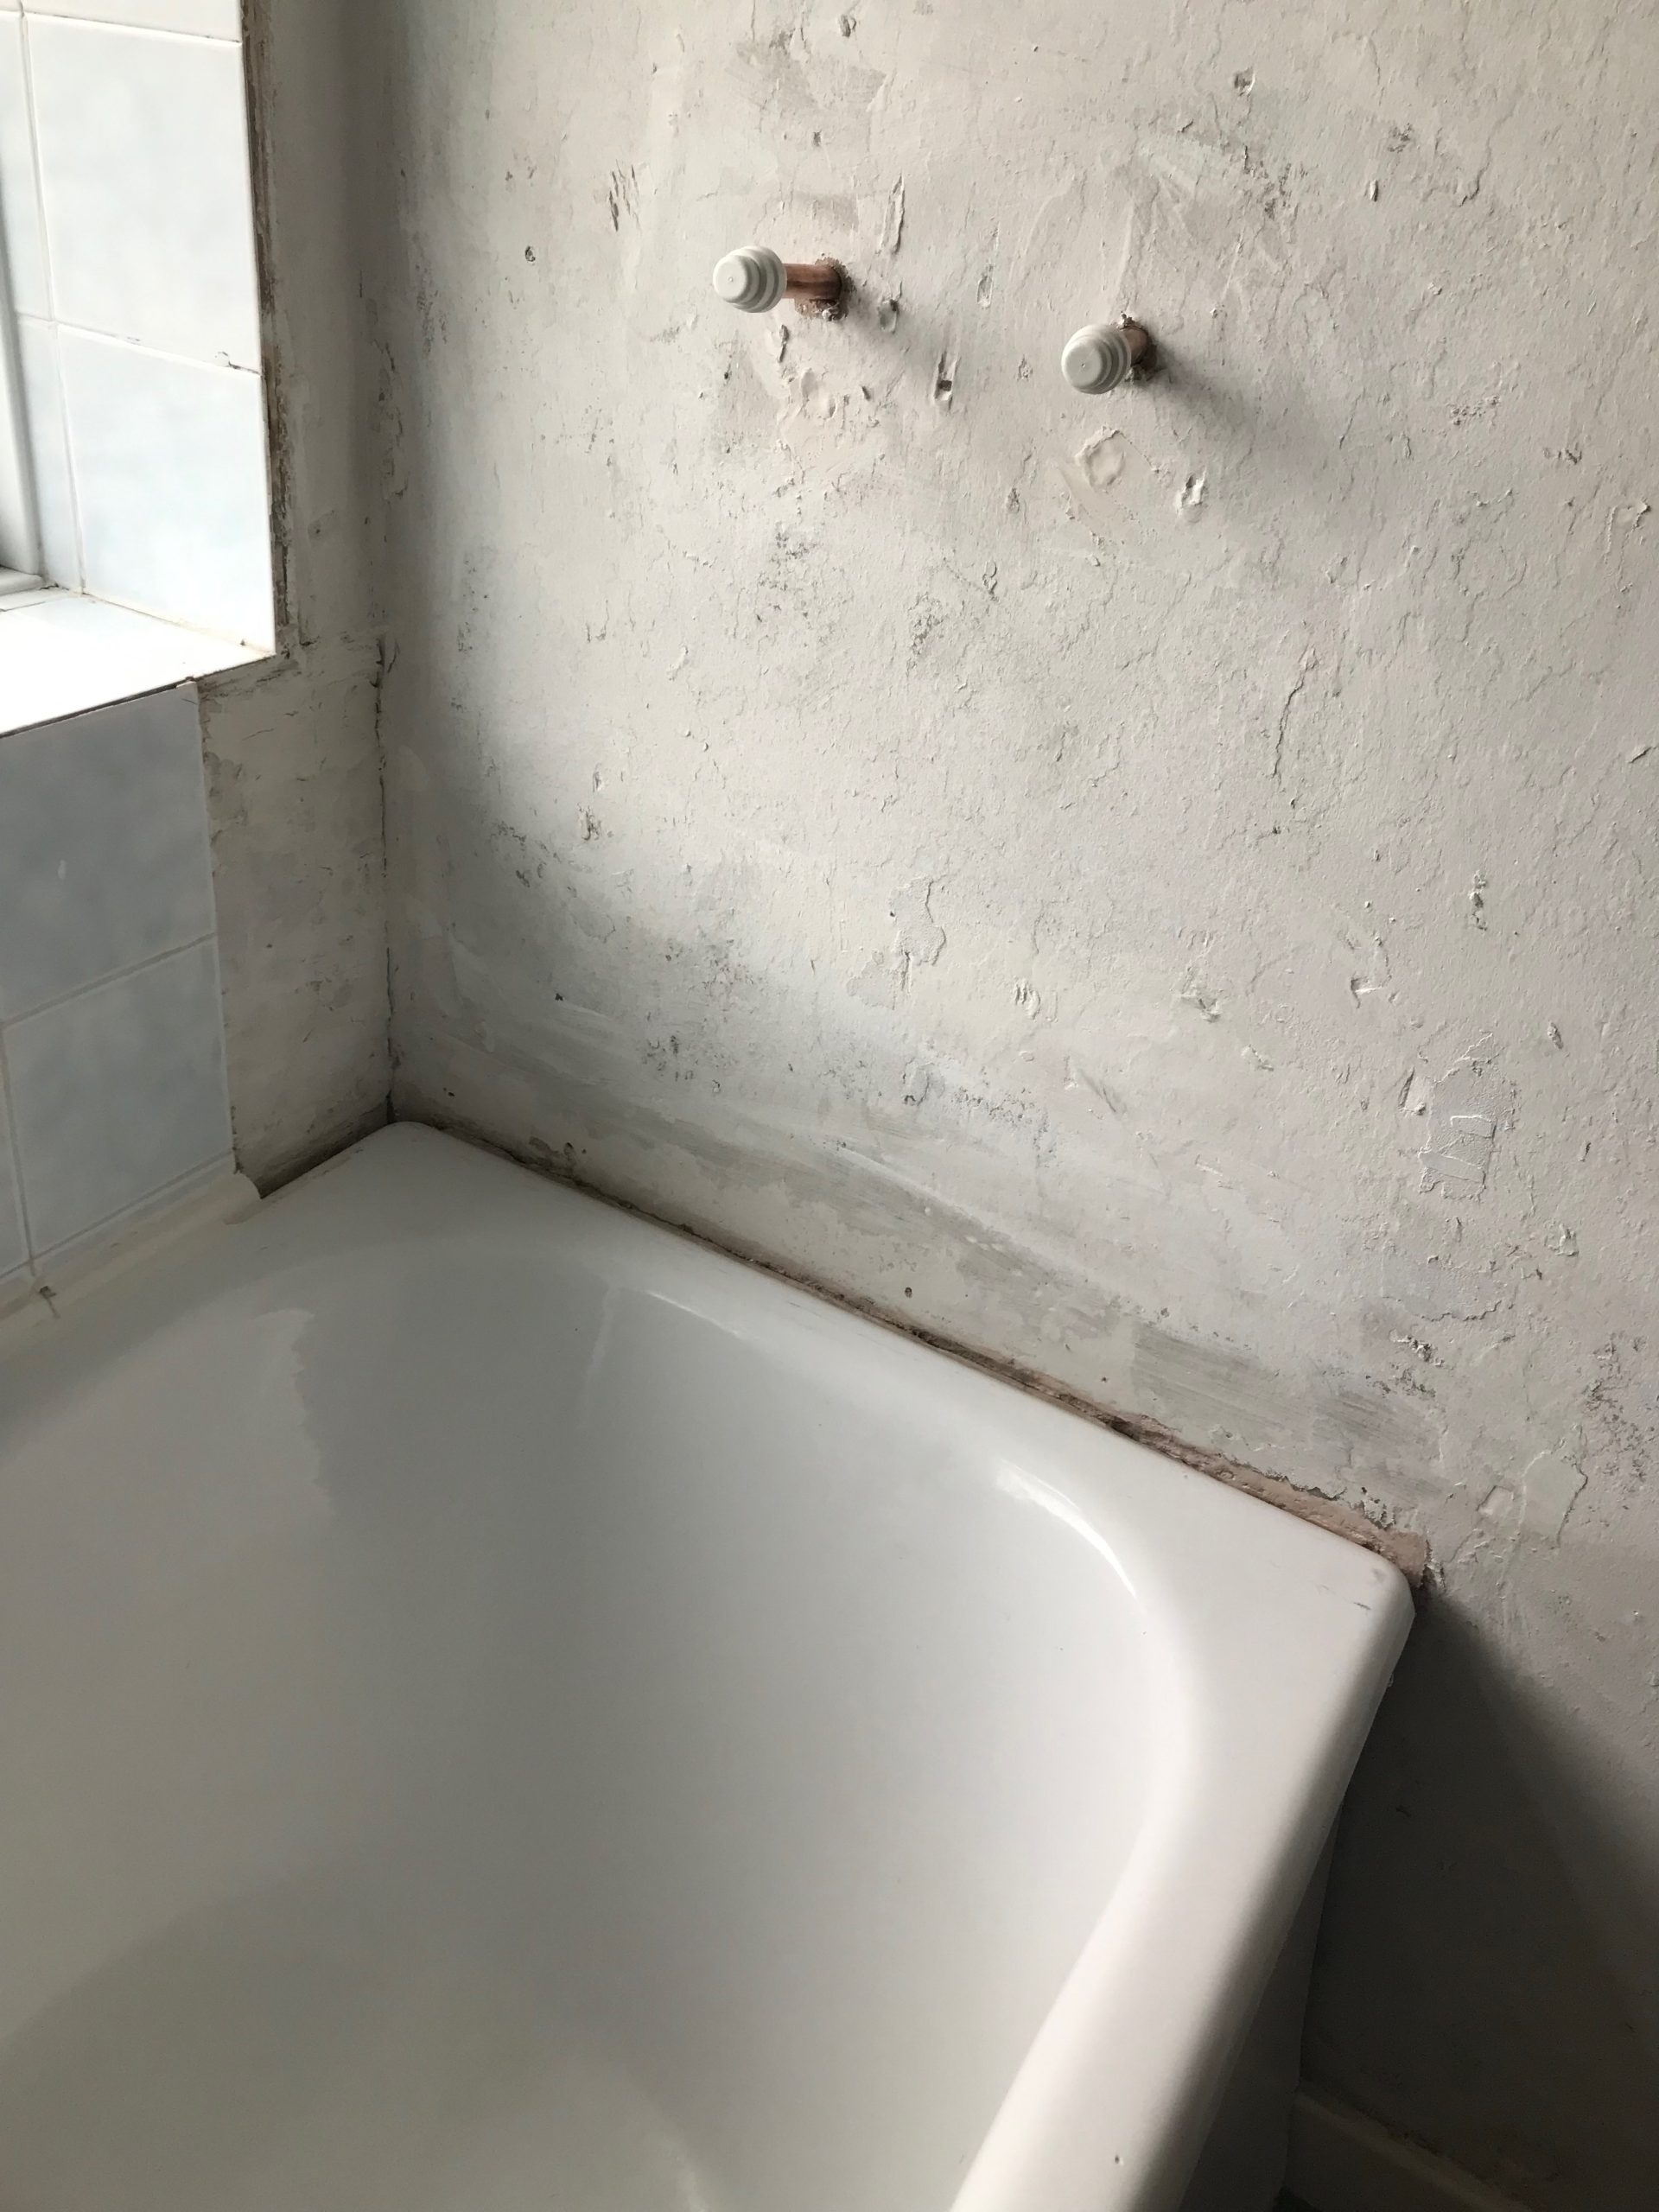
For ages we’ve been wanting a better shower and just kept putting it off as we couldn’t work out how we’d manage without a bathroom whilst the work was done. We finally decided that there was never going to be a good time to get this done so just went for it. Replacing the whole bath wasn’t an option due to both cost and convenience.

The old electric shower with some blue and floral tiles still visible around it, but a few tiles already removed. The whole situation looks very sad, not helped by the poor lighting conditions for the photo.

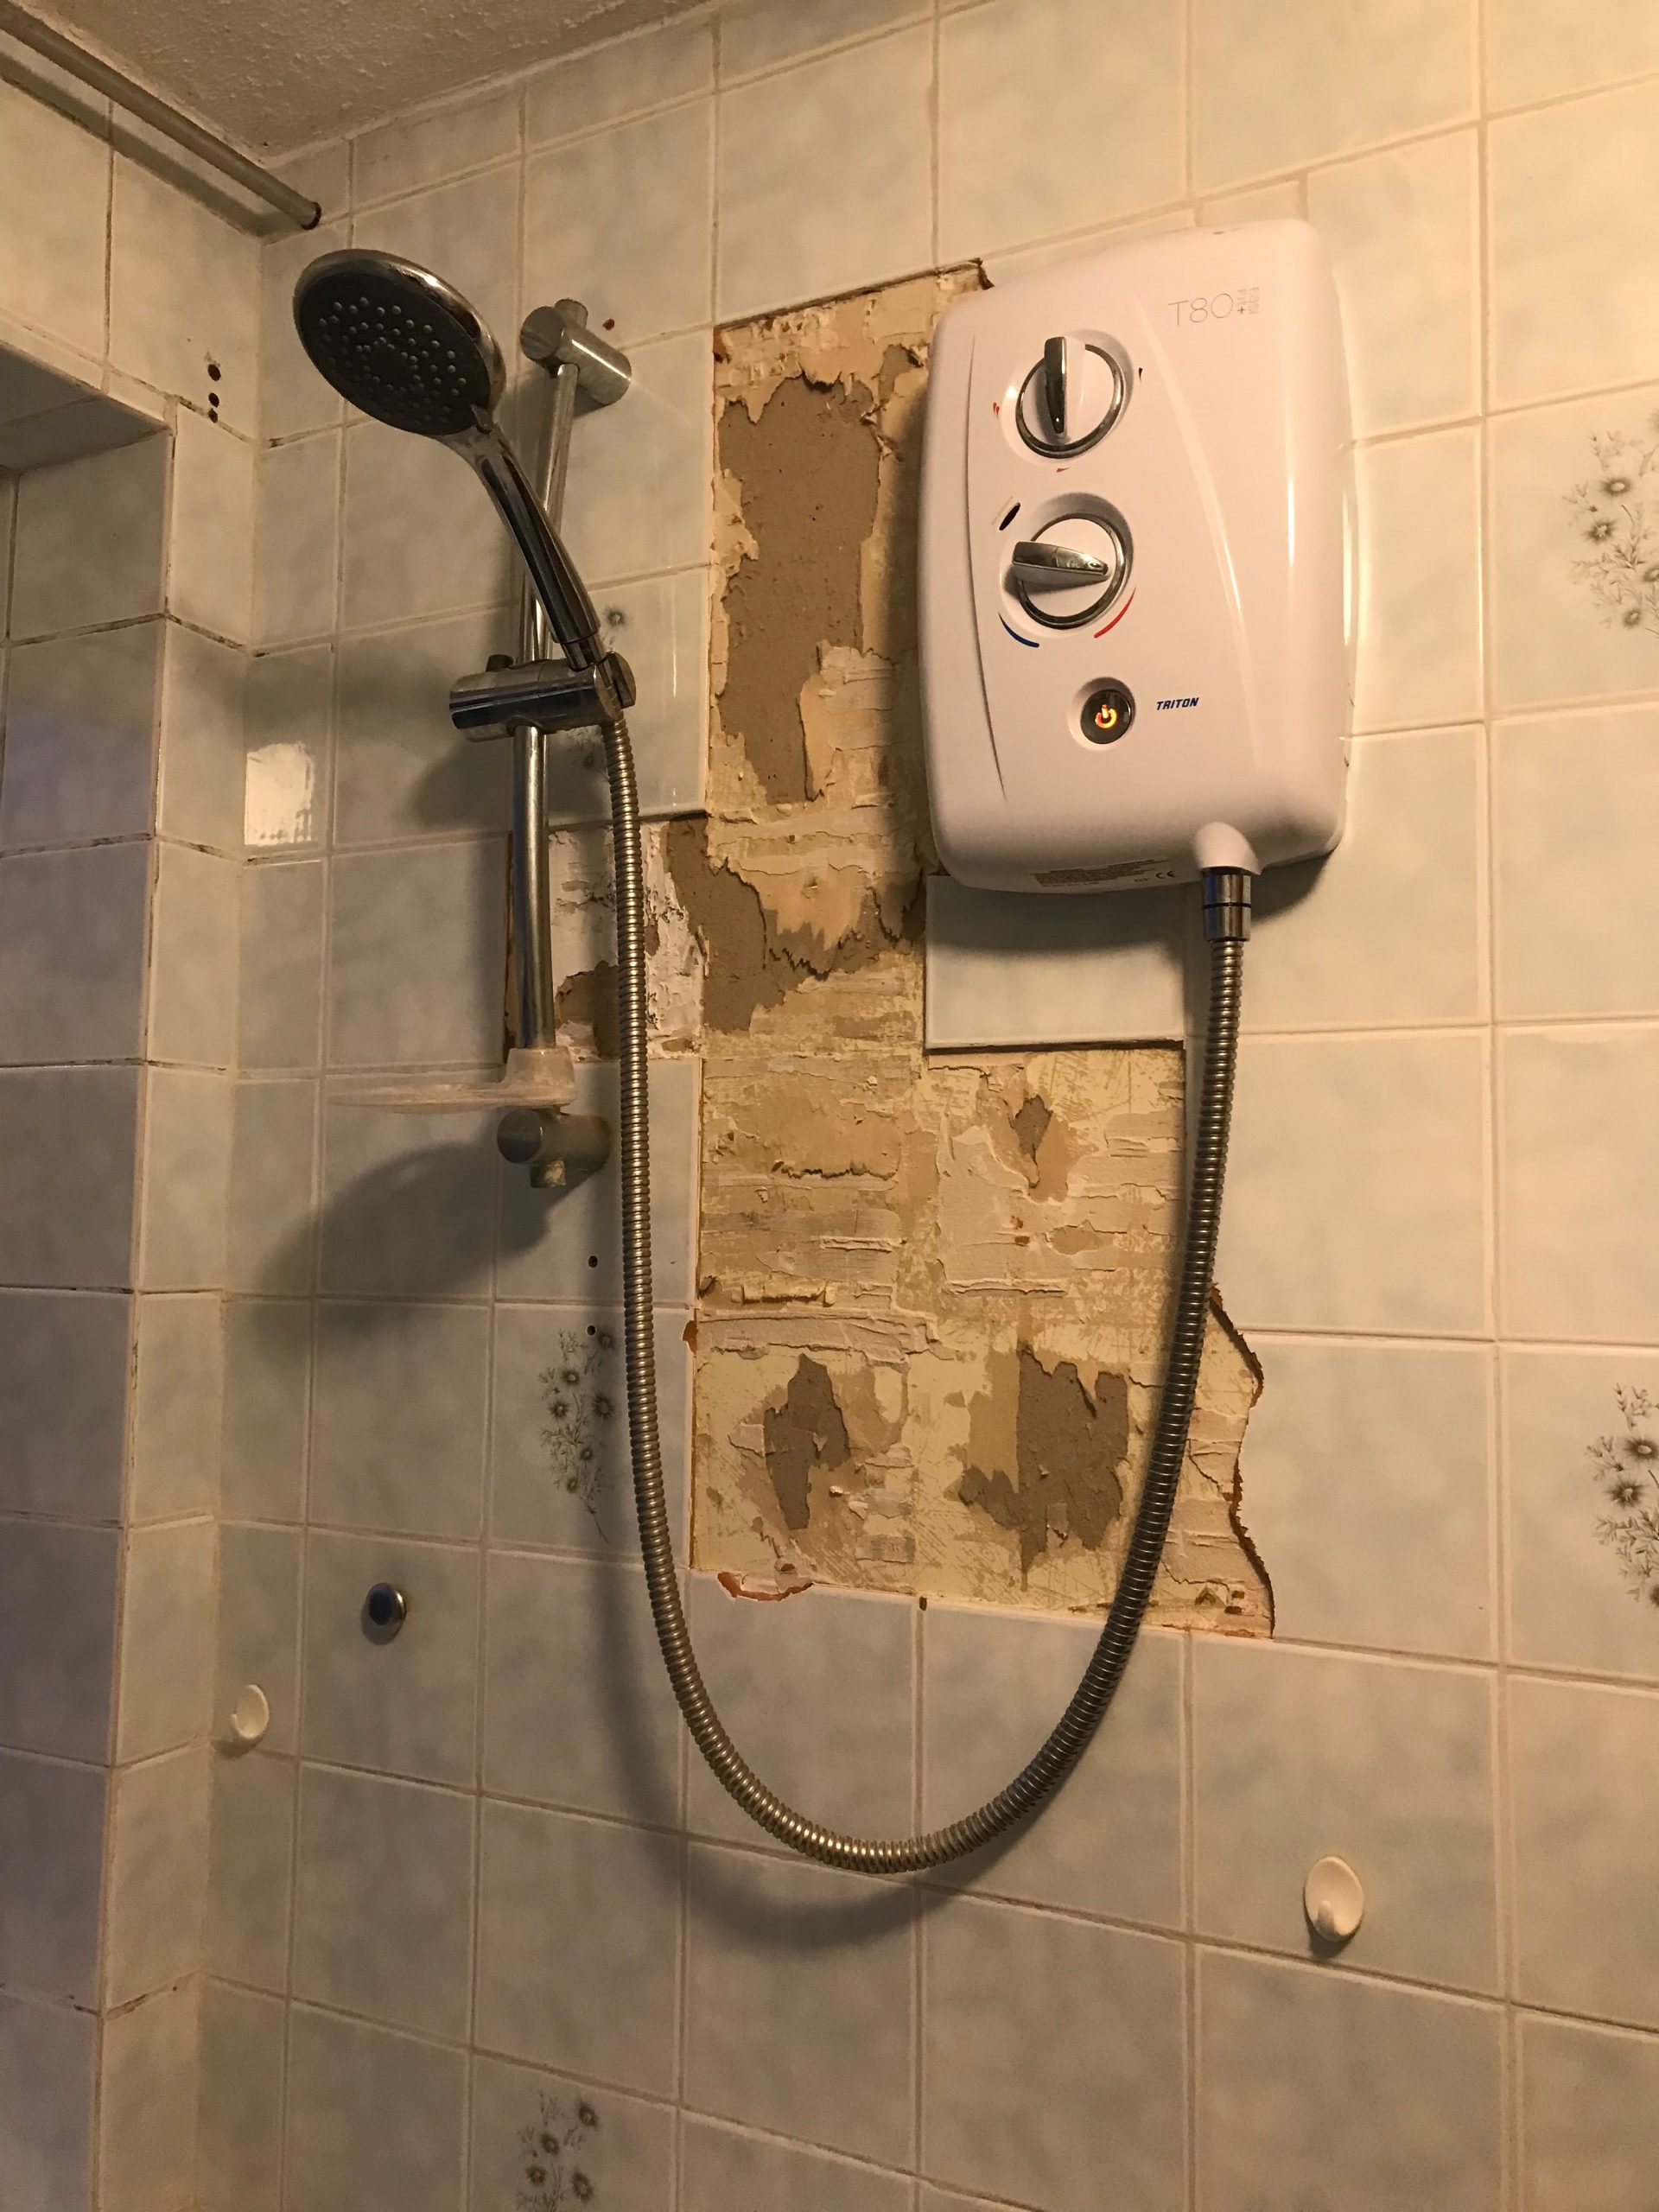
We stripped off the tiles on the wall where the shower is and then got a plumber in to decommission the old one and put in plumbing for a new shower and accompanying pump in the next door airing cupboard. We then tiled that wall ourselves and got the plumber back to actually install the new shower. This plan meant a week without a shower, but with some careful use of plastic sheets we could still use the bath.

A wall with dodgy looking plastering but showing two capped off pipes sticking out of it.

We’re now at the stage where the new shower is installed, but we’re still plodding on with re-tiling the rest of the room and it’s very much a project that’s been worked on in dribs and drabs as time allows. The shower curtain over the window side means that we can still shower whilst the rest of the work is ongoing, although on the flip side that does remove some of the pressure on us to get the job finished.

What we used

The decor choices that we’ve made so far are relatively simple, but the amount it’s changed the look of the bathroom is unbelievable. Like in the downstairs loo we went for metro style tiles, but this time in white and combined with black grout. The tiles came from B&Q as they worked out cheapest compared to other places we found locally. For things like the tile adhesive and black grout we actually bought these from Amazon as they were cheaper than the high street DIY places and there was the added advantage that it was delivered. Some of the other smaller bits we needed like rubble bags etc where also cheapest on Amazon. I know prices change regularly, but it’s definitely worth shopping around to get the best price on things.

A wall tiled in white metro tiles with black grout and showing a shiny new shower with both a handheld he'd and a rainfall head. The adjacent wall still has the 1980s style blue tiles on it.

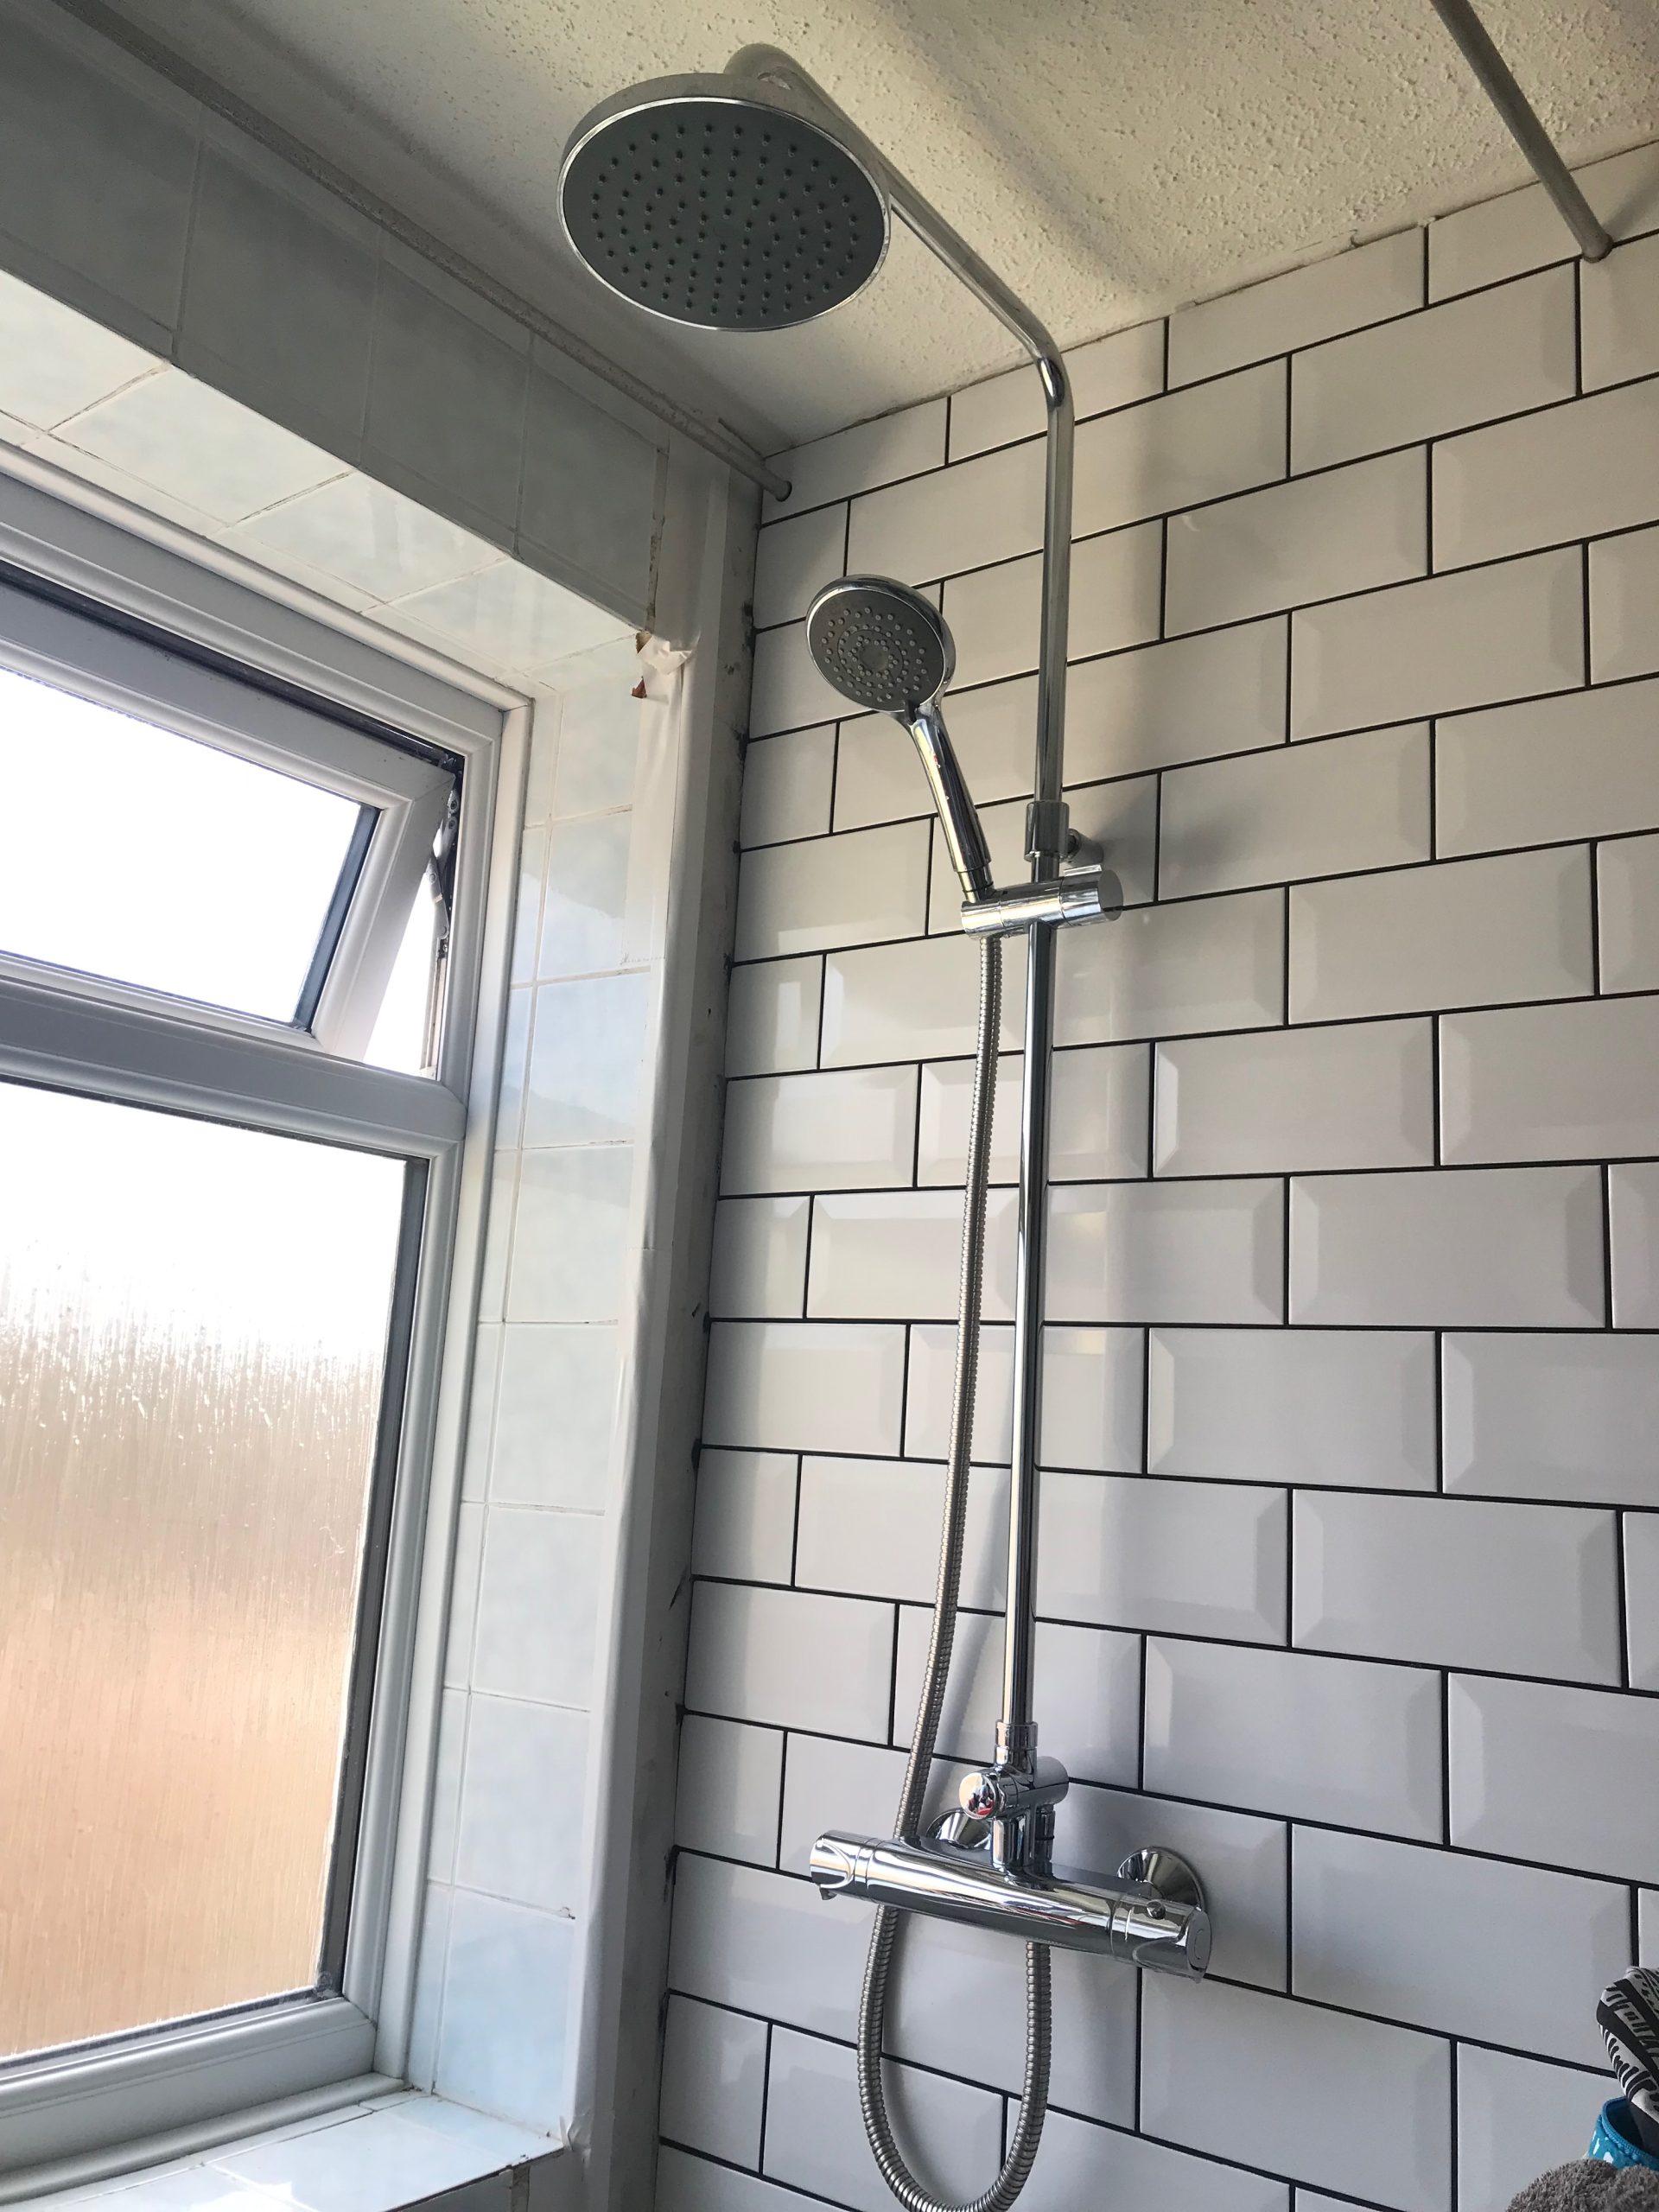
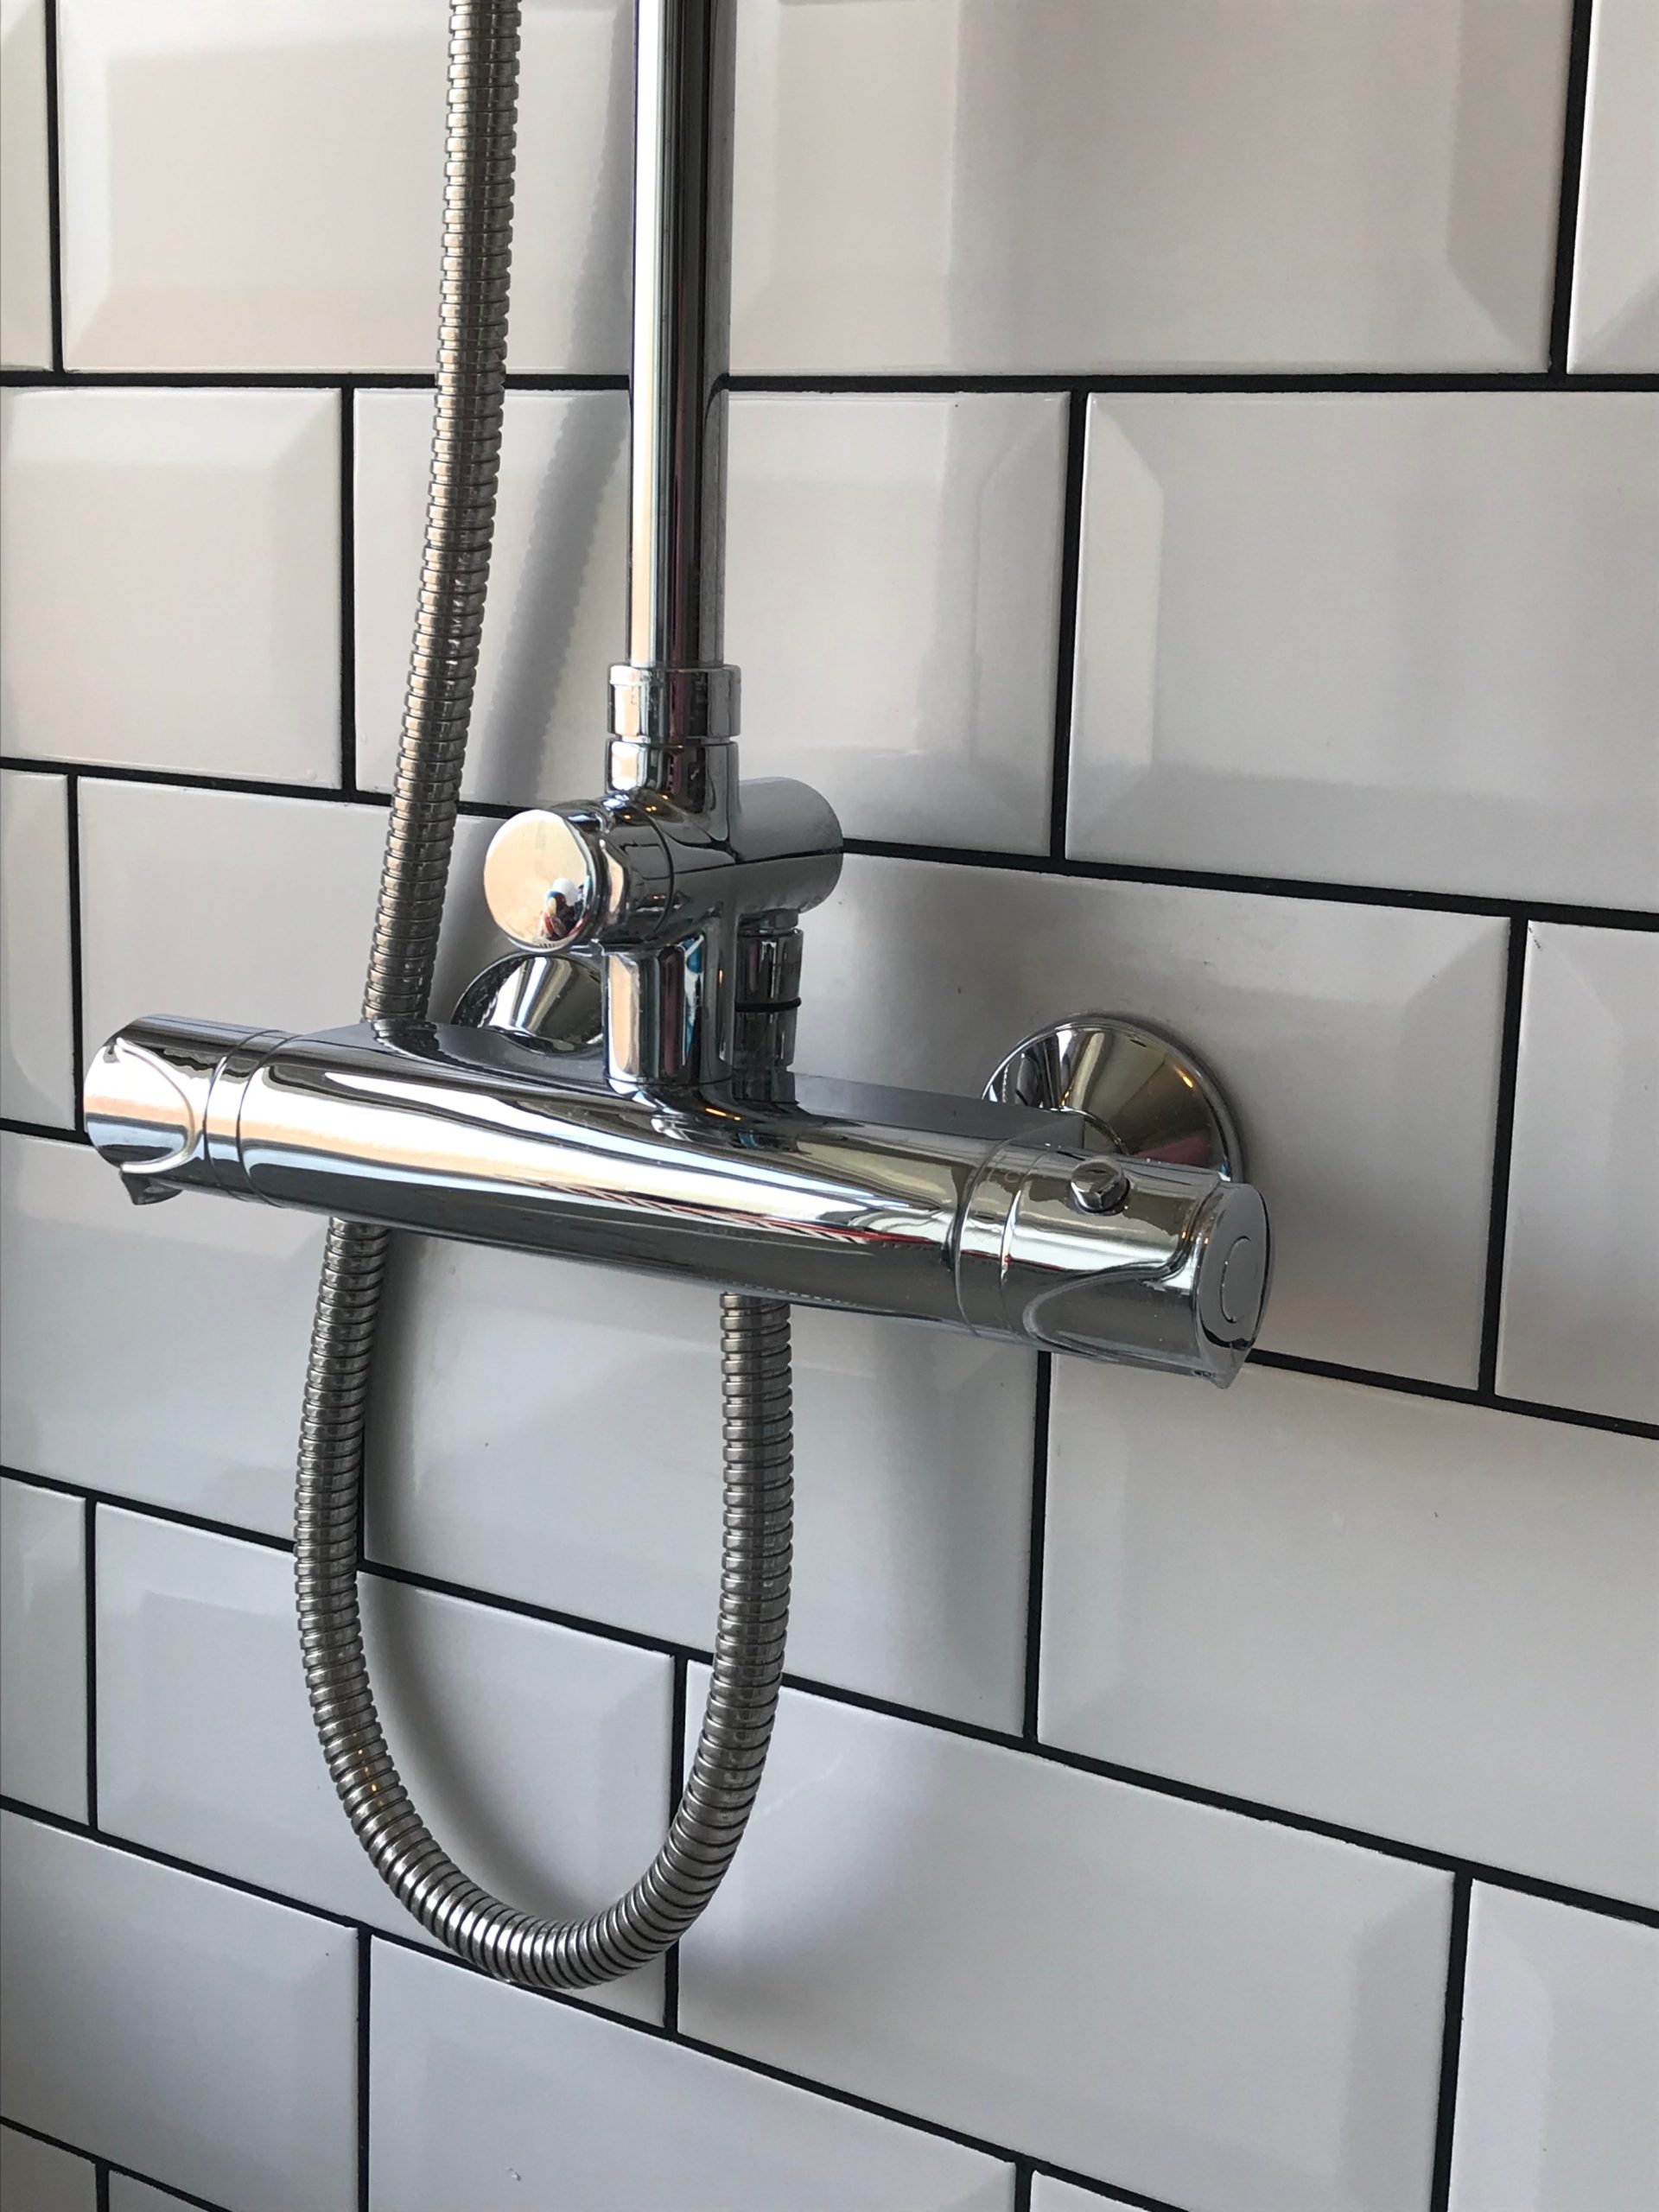
The shower were chose was a Triton one with two heads – a rainfall head and a handheld one. Absolute luxury compared to the dribble that we’d put up with for five years! This is the Triton Benito bar mixer shower. We saw it originally in B&Q but when we bought it saved about £20 by going to Screwfix. Looking today Screwfix (which is the same parent company as B&Q) is actually a whole £40 cheaper – so again definitely worth working out what you want to buy and then finding where has it cheapest.

A close up of the new shower and the white metro tiles with black grout in the background. A million miles away from the previous bathroom pictures.

There’s so much still to do and I haven’t yet touched upon what we’re planning for the wall with all the cupboards on at the moment. First though – we need to finish tiling around the bath area. Hopefully all these bank holidays in May will help us get it finished sooner.

Finding bargains

As well as doing the work to buy everything new as cheaply as possible we’ve been putting in some more work to see what we can buy secondhand. Facebook marketplace is full of things that people have bought and then changed their mind about. We’ve acquired a heated towel rail that we plan to use in the bathroom this way and last week’s bargain was a guy selling off seven (yes 7!) interior doors for the grand total of £50. All still wrapped in the original plastic and we think costing about £60 each. It means our garage is currently full of doors, but we have an absolute bargain there. We need to get hinges and handles for them all, but bearing in mind we were planning to buy new handles for all the doors anyway and paint them all this should save both time and money in the long run.

It’s also worth not throwing anything away immediately when you do work like this. Our old electric shower unit made over £30 on eBay, and as anyone doing renovations knows every little bit of money counts!

Filed Under: Interiors, Moving house

Five years and what do we have to show for it?

April 13, 2023 by Penny Leave a Comment

Oh how I just laughed looking back at some old posts on this blog.

Just over five years ago we moved into our new house. I know clearly that that is how long it is as we’ve just been through the whole painful process of re-mortgaging as our initial (incredibly low) fixed rate period has come to an end. Needless to say that our monthly repayments have gone up. As have everyone else’s.

Nearly four years ago I looked back at how much we’d achieved in our first year of living here and (validly) pointed out that we hadn’t really done all that much as we’d had a baby in that time. A few days later and a burst of enthusiasm had me writing about our unplanned renovation of the downstairs loo, although it seems I never actually got round to showing you the final result. A shame, because we did indeed finish that particular project and it still looks pretty good.

Then we moved into 2020 and we all know what happened next… The blog posts about progress dried up and so did everyone’s social lives.

A two year old child sat on the floor of a newly decorated bedroom looking at books. The carpet on the floor looks very new and on the grey wall is a sticker picture of a large tree with colourful leaves and moneys and owls in it.

Some things have progressed though – albeit slowly. The youngest finally moved out of our bedroom and into the box room – which we redecorated for her during lockdown conditions. The eldest moved downstairs into the room that my step-daughter had previously used and there was a Harry Potter makeover that included having to source pretty much everything online and making great use of the then newly set up street WhatsApp group to borrow practical things like a pasting table. The living room has been re-jigged and now works so much better for us as a family, but there are plenty of finishing touches in there that still need to happen.

All this has been done on a pretty tight budget with lots of learning new skills. YouTube and the DIY bible my late father recommended dad years ago have both been worth their weight in gold!

The years have also seen us become regular customers of a local roofing company – ironic when you consider that the roof was pretty much the only thing flagged as “green” in the survey we had done when we bought the house. Apart from that, and having to install a new loo when the old one suddenly cracked in two and started leaking(!), the only other thing we’ve paid anyone external to do is fit a carpet. But even then as it was an offcut being used to carpet a box room it only cost me a total of £100 and was another complete bargain.

Other things have stayed the same though. We’re still cooking meals on the “interim” gas cooker that we installed when we moved in. We always said that we’d get the kitchen done soon as we needed a bigger oven and the existing space only gave us 55cm to fit on into. Needless to say I’m still putting in oven trays at an angle to cook a Sunday roast as they’re too wide for the oven otherwise. Roast potatoes cooked “on the wonk” is now a bit of a speciality of mine. My son also still has the thin and sun-bleached carpet in his room that made the removal men laugh when they first saw it. Sorting out his bedroom is still high on the never ending to do list.

As we came to remortgage we knew that despite the new baby and global pandemic excuses our progress on the house has been pretty pathetic really. That’s why we’ve declared 2023 the year of “making things happen” when it comes to the house. I’m pleased to say that we’ve started as we mean to go on with huge steps already taken to make the main family bathroom more usable and at present the whole family is enjoying the benefits of finally having a decent shower, rather than just a pathetic dribble!

What I need to do now though is get back to actually recording what we’re up to in the hope that doing so will help us see how far we’ve come and encourage us to keep pushing it all further. It feels a bit like we’ve failed over the last five years in really turning this house into a home, and I’m determined to use this year to turn that around.

Standby for a series of updates and progress stories!

Filed Under: Decorating, DIY, Interiors, Moving house, New house

A year in our new home – what do we have to show for it?

August 16, 2019 by Penny Leave a Comment

This is the blog post that I should have written back in March. That’s when we marked a year of living in our new family home. The home that I had huge plans for. I think the reason I’ve been putting off the blog post though is that we’ve not managed to achieve anywhere near as much as I’d hoped to have done. Or expected to have done.

In fairness to myself, it’s not like I’ve had a year just sat doing nothing. Tube Stop Baby joined the family in November, and it goes without saying that a new baby (as well as juggling two other children) takes up rather a lot of my waking hours. And without many sleeping hours it means that many of those waking hours are spent trying to get as much caffeine into my system as possible!

As I look back though I can’t deny that I’m a bit disappointed that we haven’t done more. We’ve had to have the roof repaired – a hole in the garage roof and then a gutter blowing down revealed rotten felt under the main roof that also needed dealing with. The other big job has been getting new double glazing, which was something that we knew we needed when we first bought the house as many units were blown and you couldn’t even see out of our bedroom window properly. That’s made the house look far better from the kerbside, but there’s still so much more to do and other things that look bad. Especially inside.

paint

We’ve only managed to paint one room so far, and that still hasn’t been finished and was just the porch! A bit pathetic really.

And then there’s the garden. I’m not even sure where to start with that. Possibly with a chainsaw – but that’s another story.

We need to save up to extend the house too, as at the moment TSB doesn’t even have her own bedroom and it looks like sharing with one of the others isn’t going to be an option for a variety of reasons. That’s going to take some time and means I need to concentrate on work a fair bit to do so.

This week efforts to finally change some taps (again something that we had been meaning to do since we moved in!) has resulted in a cracked sink and the need to replace the sink before we end up with a bigger problem that needs solving. Hence spending most of yesterday wandering round B&Q and suddenly having to choose new tiles for the downstairs loo. It’s given me the kick start I need though. I need to put my stamp on this house and make all those changes that I’ve had in my head for ages.

There are many jobs around the house that scare me, but I’ve been and bought myself a new copy of the book that my dad always referred to as the DIY bible (this book if you’re wondering – worth every penny, althoughI actually found a copy for 50p in a charity shop!) and I’m determined to show that this girl can. Let’s get this house sorted!

Any tips to good online DIY resources very gratefully received.

Photo by Taelynn Christopher on Unsplash, quite simply because there is absolutely nothing here worth photographing yet!

Filed Under: DIY, Interiors, New house Tagged With: decorating, diy, new house, painting

A first lick of paint… discovering Frenchic

April 24, 2018 by Penny Leave a Comment

Sometimes something drops into your inbox at exactly the right time. That was the case with an invitation from Frenchic to their Blogger and Media Showcase event in London, which took place last week.

When I first received this I was on the edge of my seat with anticipation about the new house we were in the process of buying. At that point though, despite everything being in place from our end, our vendor’s solicitor was still fast asleep! I didn’t know if accepting the invitation would be tempting fate or not. As it happens, it was probably one of the best things I could do.

Our new home

The house we now own had the same family living it for nearly 50 years. It’s fair to say that nothing has been updated since the 1980s. There are some interesting carpets, lots of floral wallpaper, dated tiles and some very dark wooden doors. It’s not a property with what estate agents would call “character features” but instead has tonnes of potential. We realise that that equates to lots of work, but we are thrilled about the idea of a challenge. We want to be able to put our stamp on the place.

I’ve watched enough upcycling programmes to know that it is possible to do a huge amount with a bit of imagination, lots of enthusiasm and a limited budget, but finding the right materials can be key to success. And that’s where I think Frenchic is going to pay a key part in our home’s transition into properly becoming ours.

Introducing Frenchic

Now, before last week I wasn’t really familiar with Frenchic. The name rang a vague bell, but if I’m honest that was all. A massive lack of funds means that I had been staying out of the shops recently. A fear of jinxing things with the house had stopped me from even pinning interiors ideas on Pinterest.

The fact that the Frenchic day took place just a couple of weeks after moving really make it perfect timing. Since coming onto the market in December 2014, Frenchic’s eco-credentials mean that it has become a firm favourite with everyone looking to update their home or up-cycle in as environmentally friendly a way possible.

Frenchic

There are no hidden chemicals in Frenchic paint and it simply lacks that paint smells that I got so used to using chalk paints in the past. It goes on like a dream, and their range includes genius ideas like an Al Fresco range for use outdoors and also their Lazy range (genius name!) even has the wax already in the paint. That means that once it is dry you don’t need to wax it, just buff it up. In addition to these and their standard chalk and mineral paint, they’ve also got a wall paint, one for trims, and additional products like a crackle glaze (to use between paint coats to give a crackle effect) and waxes and a finishing coat product.

I was blown away at the blogger day when everything was demonstrated to me. As I sat there I was making a mental list of the various parts of my house that need things doing and the products I could use to transform everything. There are wooden fitted wardrobes that need refreshing, old bathroom tiles that need updating, a wooden banister to cover, dark wooden doors that need a lighter shade and a whole 1980s kitchen that is incredibly functional, but as ugly as sin.

Frenchic

I kept my project for the day small to allow me the headspace to come up with more details plans of what I could do where. Encouraged by some of the Frenchic stockists I decided to try my hand at using some of their paint as the base on a little birdhouse. I then went on to decorate with decoupage (another craft that I have strangely never actually tried my hand at).

Decoupage

I kicked off by using the Al Fresco range on this simple wooden birdhouse (available from The Works here). One top tip was to use a light colour if you’re going to decoupage over it, as otherwise your background colour will swamp your decoupage detail.

I then set about with a pile of paper napkins to choose my decoration. Inspired by a birdhouse that one of the staff had already completed, I went for a bumble bee theme. I quickly set about tearing out bumble bees. The trick to decoupage using napkins is to use just the top layer of three ply napkins. Normally this is the only layer that has the picture printed on it. All you need to do to separate the layers I wet your finger and thumb and then press them hard onto the napkin, and hey presto – when you separate them again the napkin comes apart.

I was then taught how to simply use Frenchic Finishing Coat to attach the napkin. Paint a thin layer on then lightly lay your napkin detail in place. Then use some scrunched up cling film, to work from the centre of the picture outwards to squeeze out the excess finishing coat from underneath and also expel any trapped air bubbles. On a bigger surface you can even put a plastic bag over your hand to smooth it out.

Frenchic

I decided to use a complete sheet of napkin to cover the roof of my birdhouse. Then I added further details to the front and sides by tearing out some of the bees. I also added some plants on the sides from a different napkin design. What is strange is just how addictive the whole process was. Suddenly I felt my creative juices flowing and away I went. Several people stopped as they passed by to tell me how much they liked what I was doing. That just seemed to inspire me even more.

Back home

I’m delighted to have come home with a gorgeous finished birdhouse. I am planning to hang in my kitchen to constantly remind me of my first project in this house. There was also a goodie bag packed with Frenchic products, so I can start putting our own stamp on this house. As I sit writing this a week later I’m delighted to say that project number one is already complete. Watch out for a blog post on just that very soon, and I’ve got a couple more planned. I’m also back to pinning like mad on Pinterest for inspiration of what else I can do.

One of the Frenchic team also introduced me to their fantastic Facebook group. It is full of people sharing their Frenchic projects, and is so inspiring!

Be warned, if anything stays still in this house, it now stands a very good chance of me painting it!

Disclaimer: I was delighted to be invited along to the Frenchic blogger and media day. This post includes affiliate links.

Filed Under: Decorating, Interiors, New house, Upcycling Tagged With: chalk paint, Frenchic, upcycling

Primary Sidebar

Google Ads

Categories

  • Baking
  • Blogging
  • Books
  • Business
  • Car Boot
  • Childrens Crafts
  • Collaboration
  • Corona Diary
  • Crafting
  • Crafts
  • Crochet
  • Days Out
  • Decorating
  • DIY
  • Environmental
  • Family
  • Fashion
  • Films
  • Finances
  • Fireworks
  • Food and drink
  • Gardening
  • Gifts
  • Halloween
  • Health and Fitness
  • Home
  • Interiors
  • Knitting
  • Life
  • Moving house
  • Music
  • New house
  • Outdoors
  • Parenting
  • Pregnancy
  • Relationships
  • Romance
  • Sewing
  • Simple things
  • Swimming
  • Television
  • Thrifty
  • Travel
  • Upcycling
  • Vintage
  • Womens Institute
  • Work

Penny on Amazon

Want to find out what I’m recommending over on Amazon at the moment? Take a look here.

Copyright © 2025 · Genesis Sample on Genesis Framework · WordPress · Log in