• Skip to primary navigation
  • Skip to content
  • Skip to primary sidebar
Penny Blogs

Penny Blogs

An insight into the things in life that make me smile

  • Home
  • About Penny
  • Pregnancy
  • Privacy Policy and Disclosure

Halloween

Halloween Crafts – Halloween Hama Beads

October 22, 2018 by Penny Leave a Comment

If you follow me on Instagram you’ll have seen that my Halloween crafts are back decorating the house again this year and one of my favourite bits has to be the Halloween Hama beads that were partially inspired by the selection that CraftMerrily included in a Bostik Bloggers box a few years back. It’s time to share what I did back then with the Penny Blogs audience.

Pumpkins (or Jack O Lanterns as they’re called in the US) are one of the most obvious Halloween symbols to me, so they were the most obvious place to start with my Halloween Hama Beads. The urge to make them was so great that no only did I use up all the orange beads I could find in the house, but I also placed a separate order for more of them!

Halloween Hama Beads Pumpkin

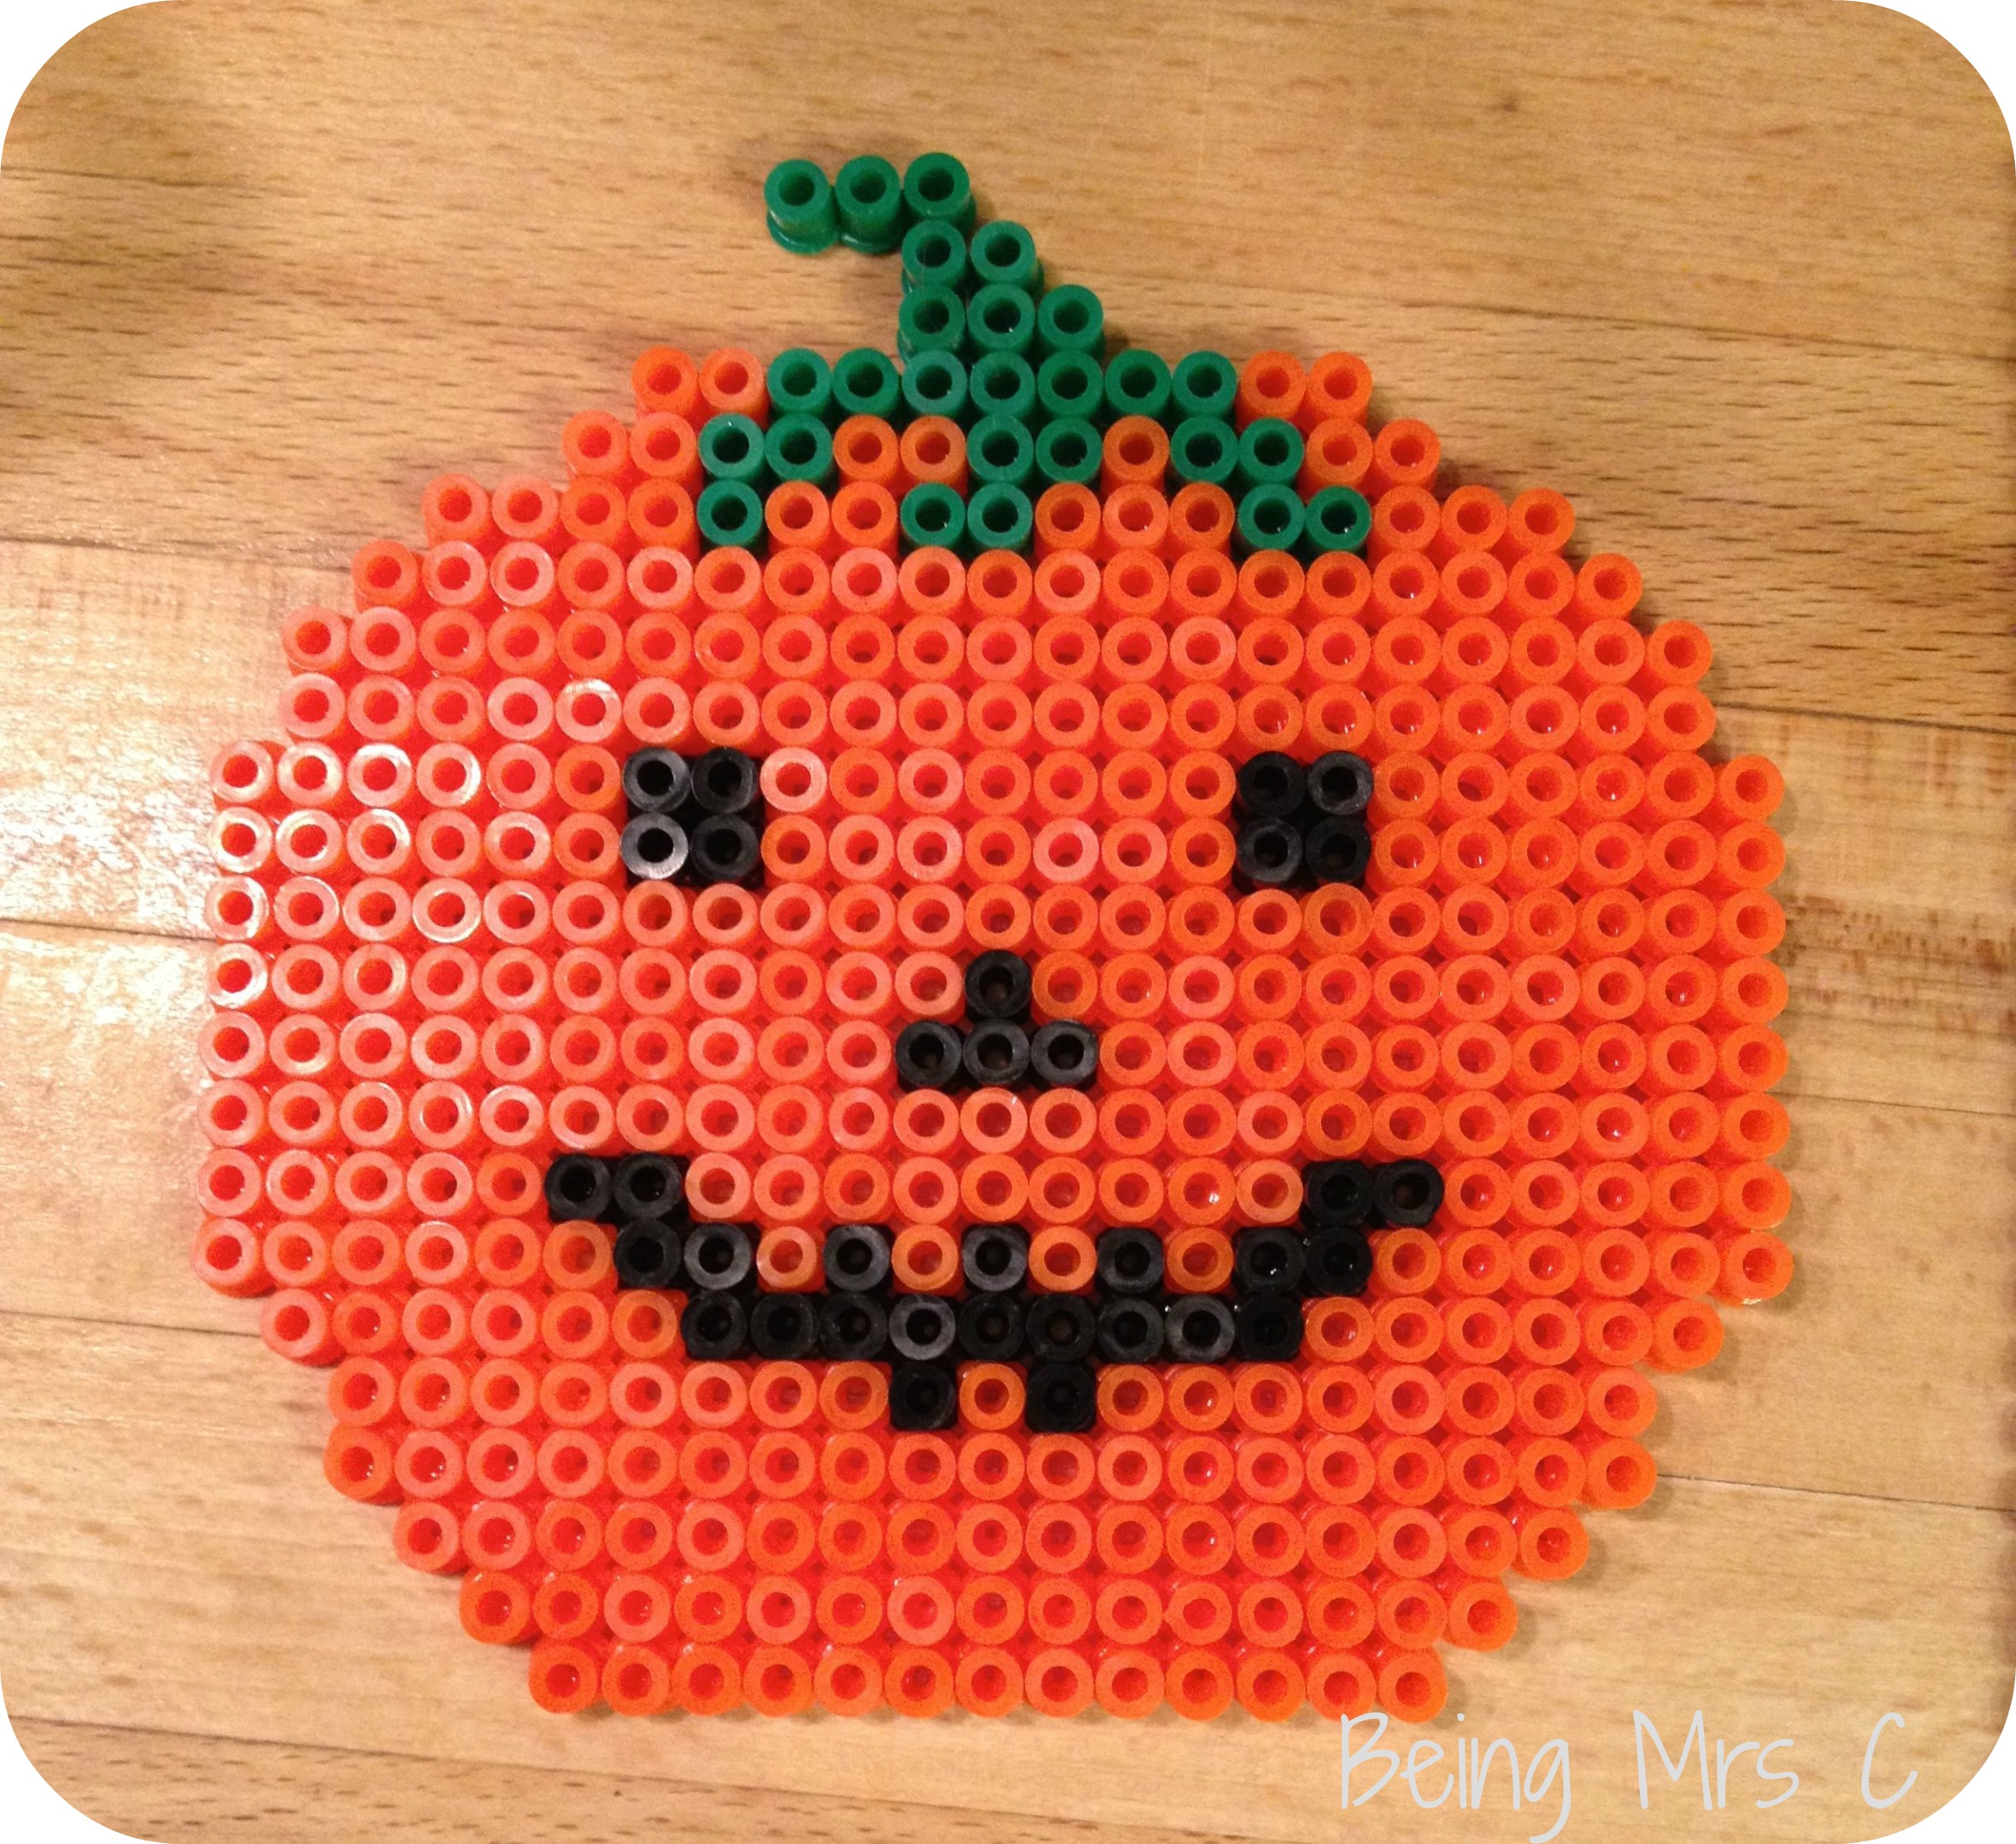
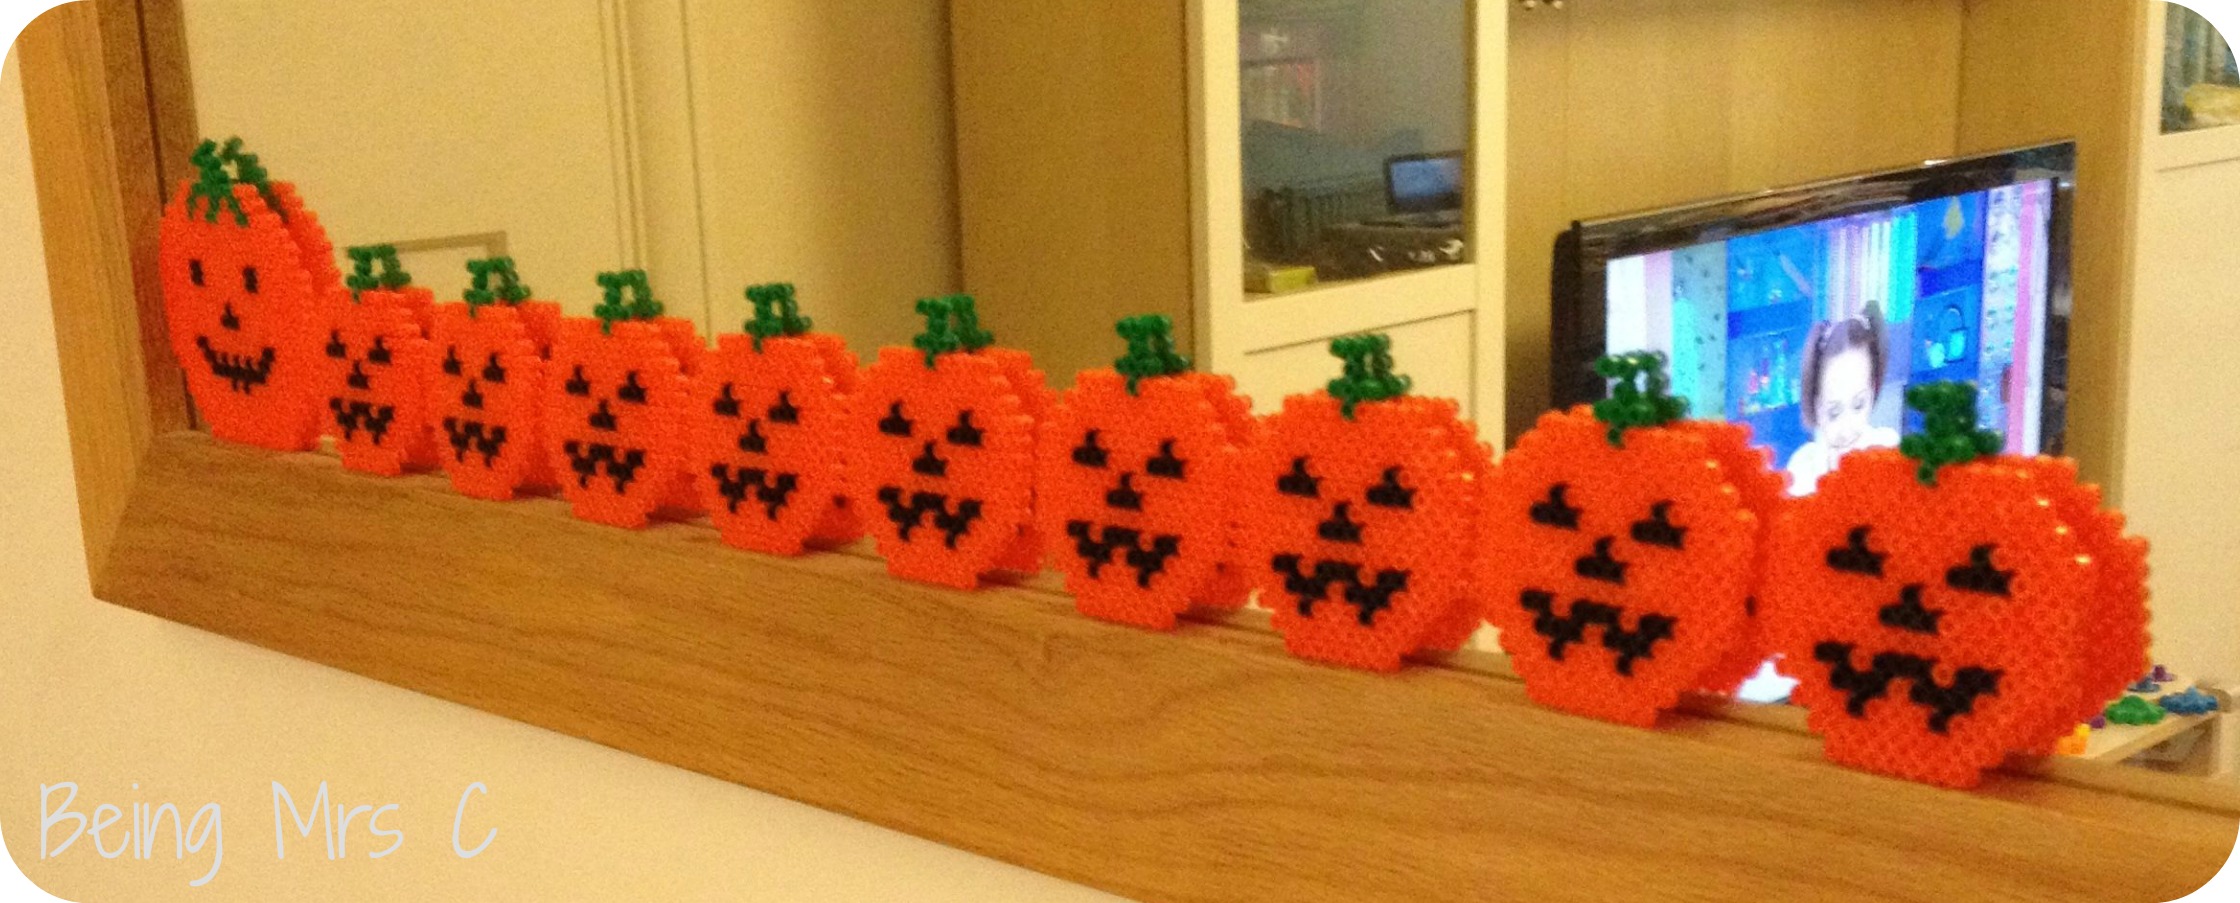
After making one large pumpkin (pattern found on Pinterest – and pinned on my Halloween board there) I then moved on to a smaller design with the aim of making some Hama bead bunting. Ideally I would have made more pumpkins, but to be honest I just ran out of orange beads! As I made them I lined them up on the bottom of the big mirror we have in our lounge and liked them all there so much that I just didn’t have the heart to move them when I finished.

Halloween Hama Beads Pumpkins

Whilst waiting for an order of orange beads to arrive I tried modifying some cross stitch patterns that I’d found to create some other Halloween characters.

Halloween Hama Beads Skeleton

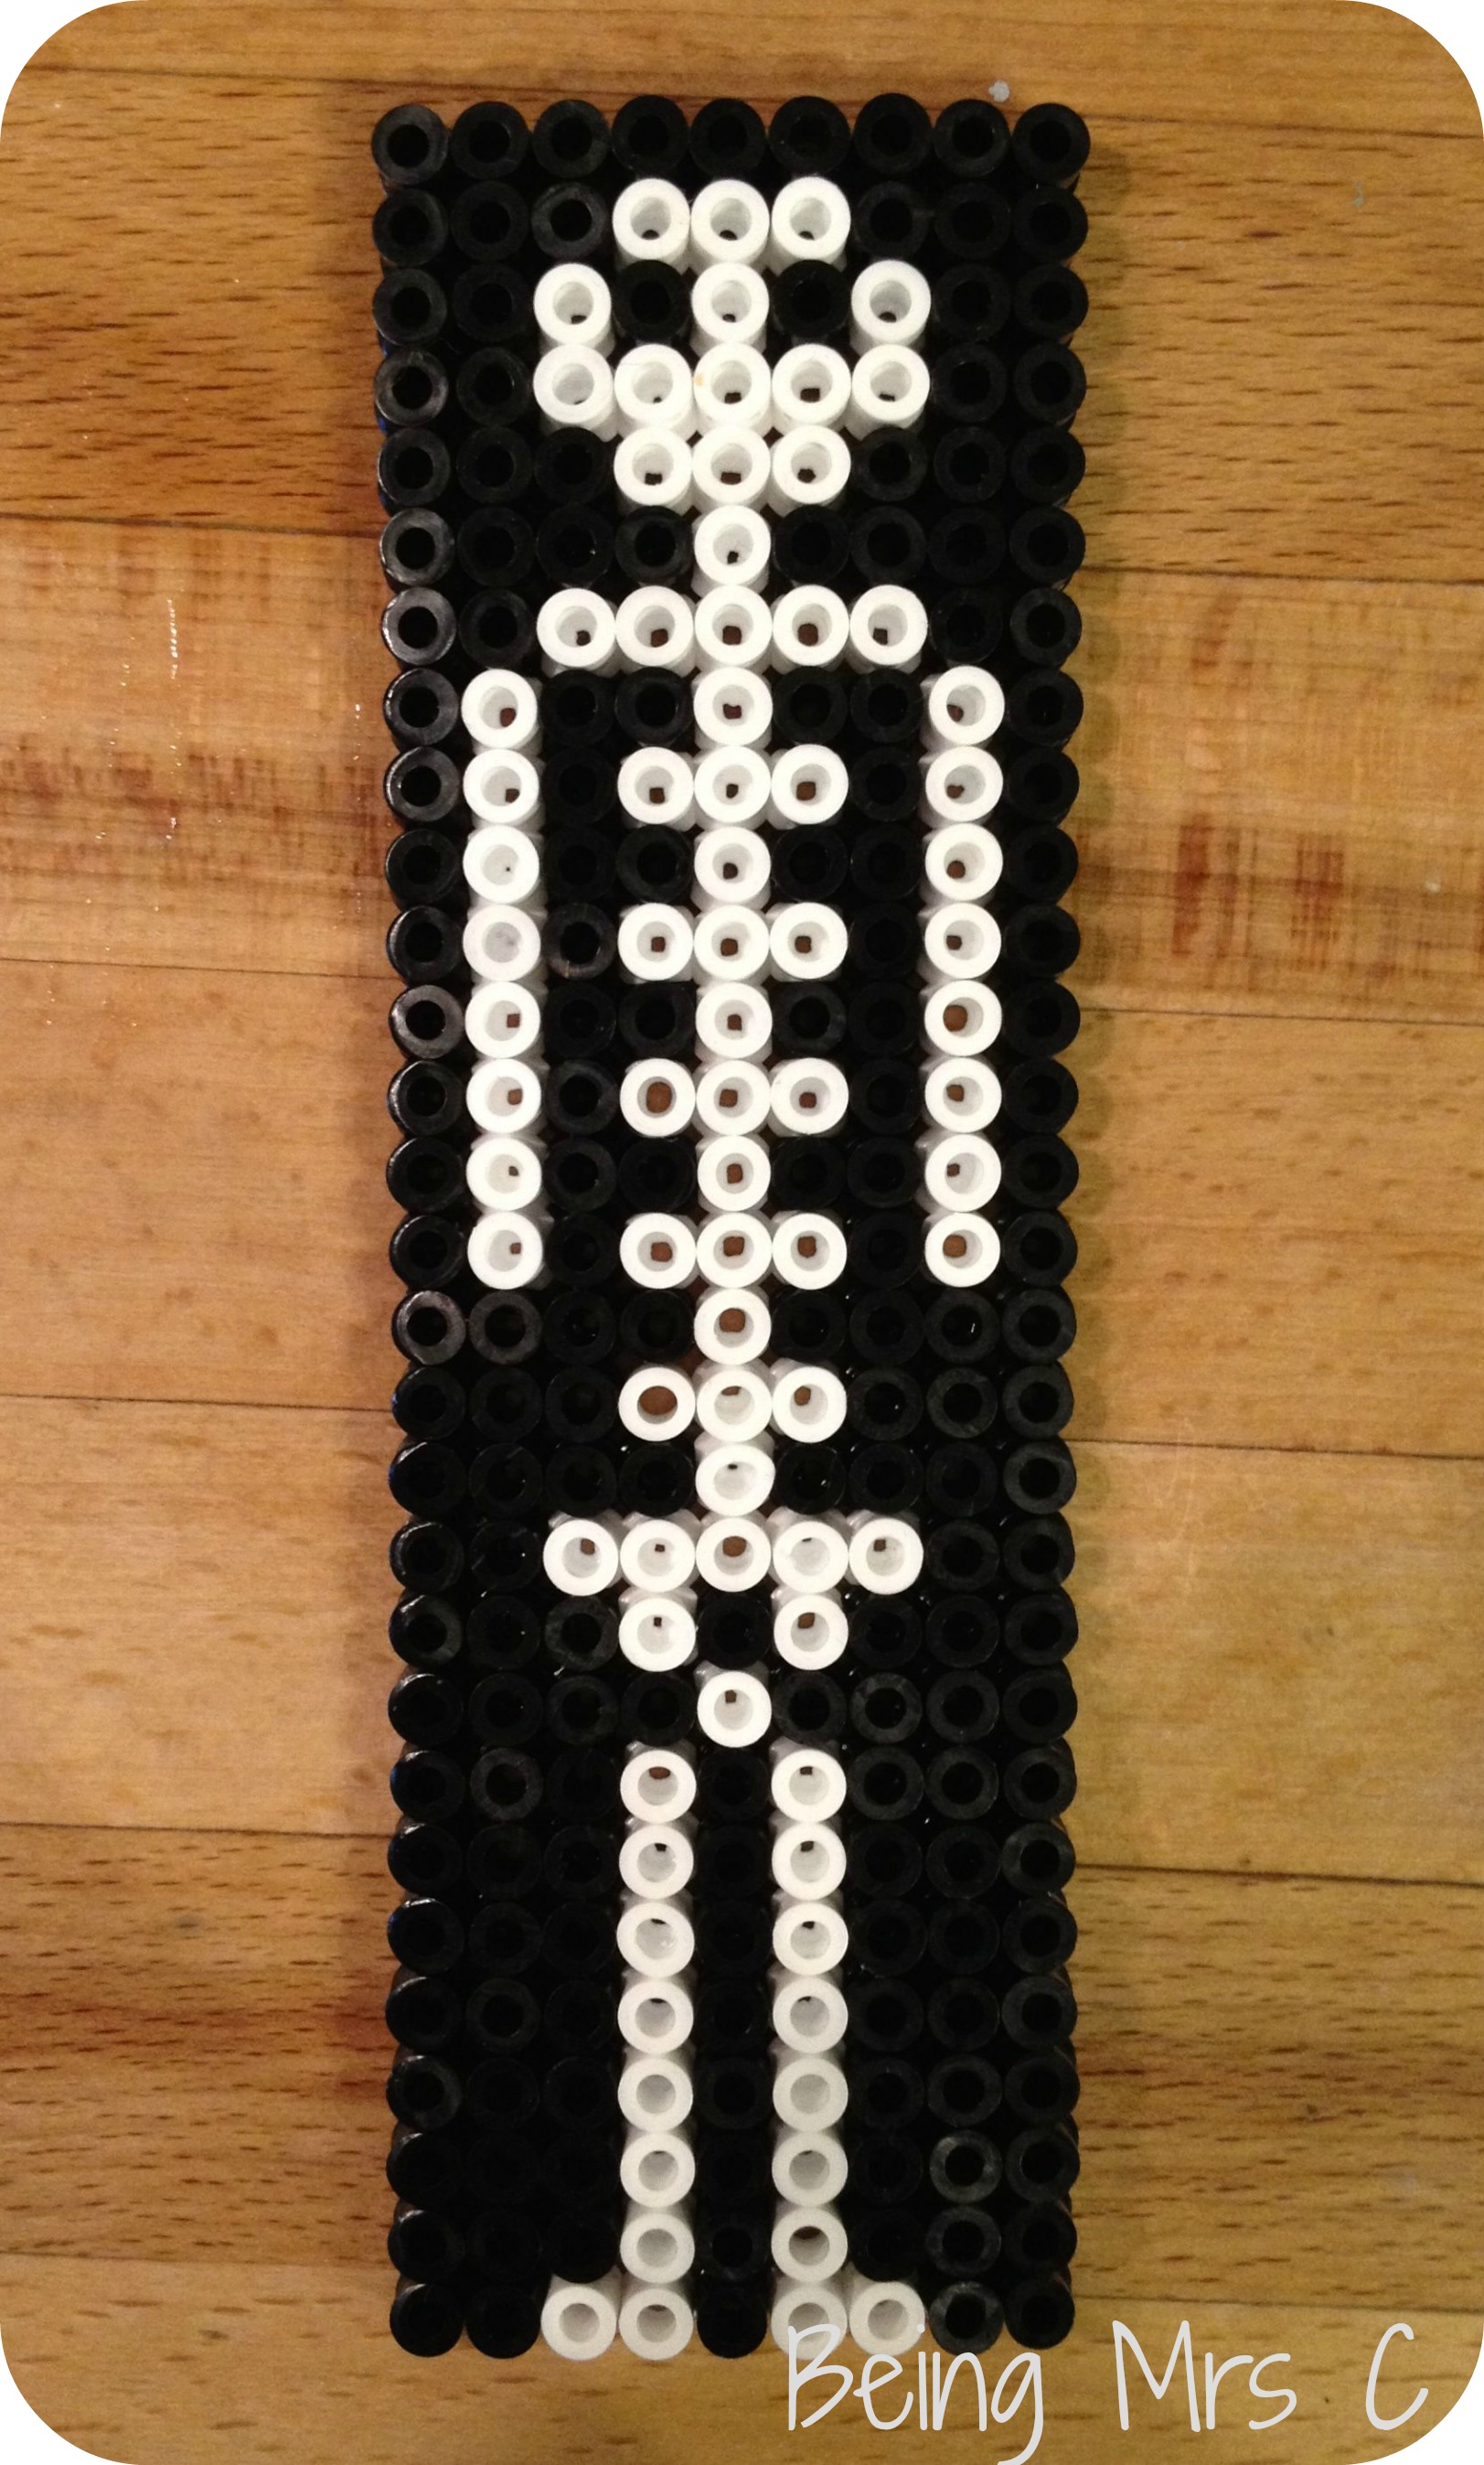
I started with a simple skeleton – not too bad for a first attempt.

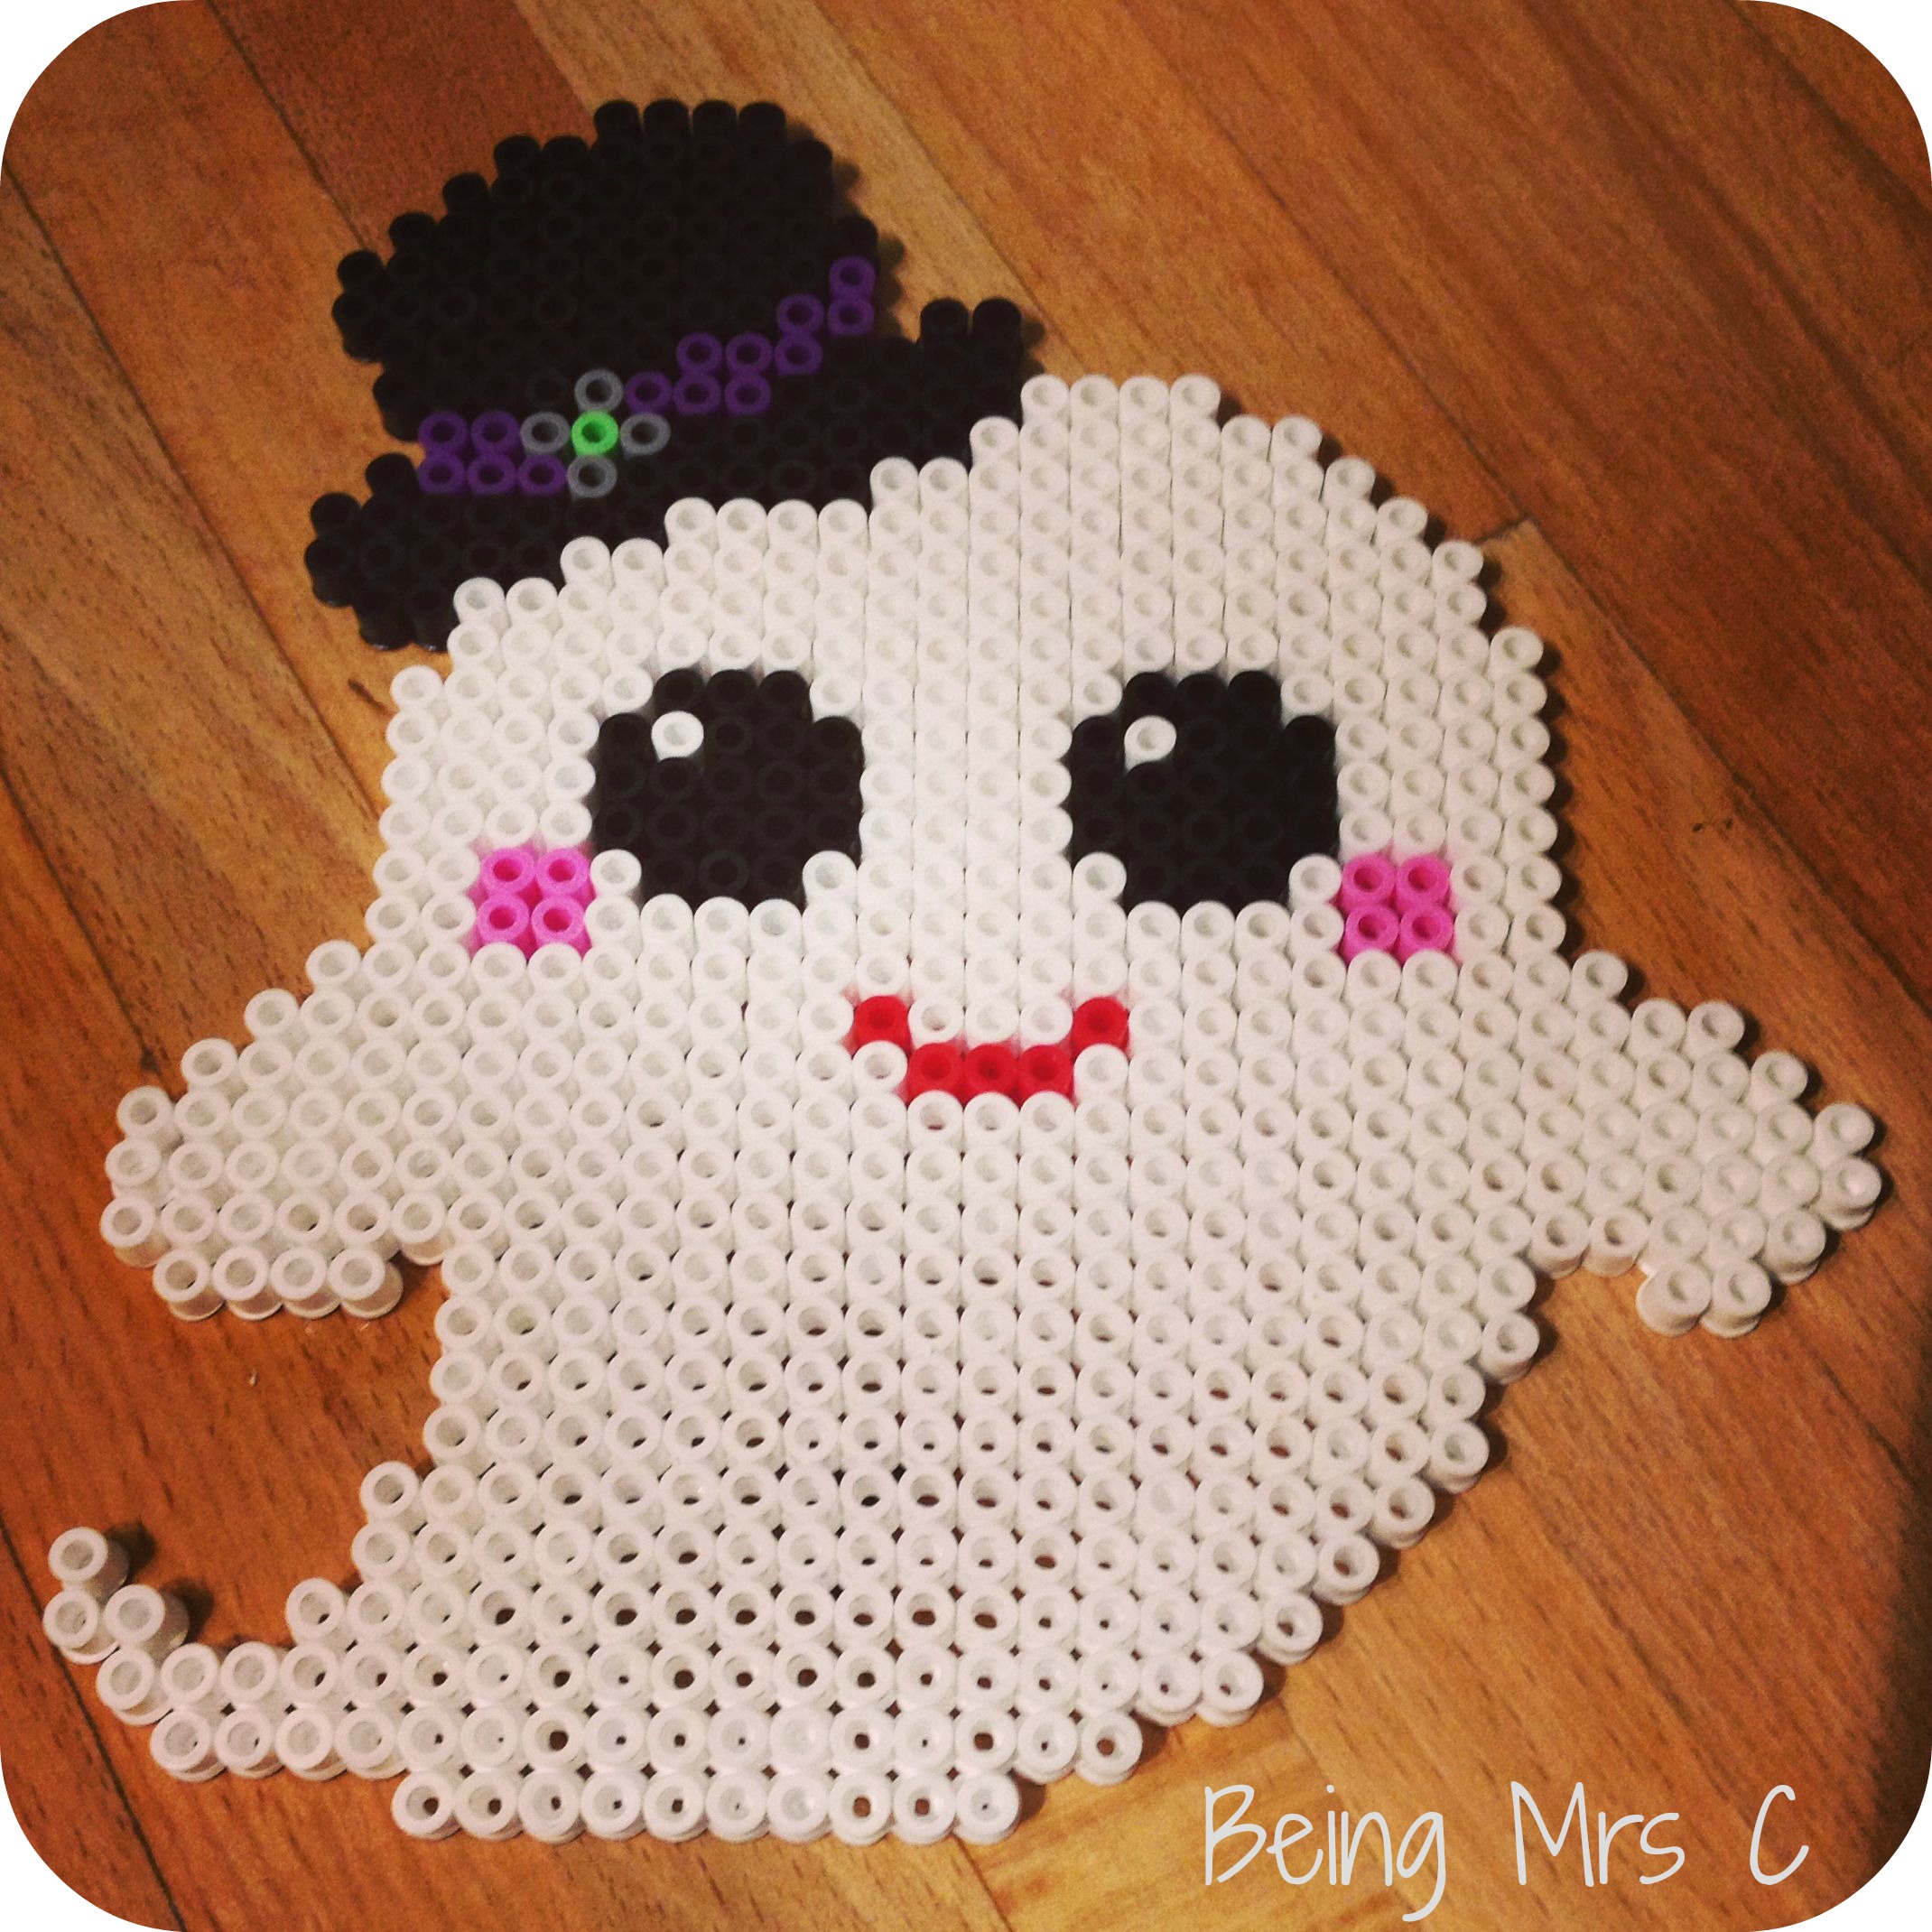
Then I totally depleted my white bead supply with this cute ghost. There’s no way you could describe him as scary but I am completely in love with him!

Halloween Hama Beads Ghost

The thing I’m fast discovering with Hama beads is that no matter how many of them you seem to have in the house, you never have enough in the right colours to make exactly what you want to make when you want to do it. I’m coming to the conclusion (whilst I wait for my next order to arrive!) that buying in bulk and having lots of storage boxes (and you can even buy ones designed for Hama beads these days) sorted into colours is the way forward.

Disclaimer: This post was originally published on Being Mrs C as part of my work as a Boston Blogger. It contains affiliate links.

Filed Under: Childrens Crafts, Crafts, Halloween Tagged With: ghost, Halloween, halloween craft, halloween crafts, halloween Hama beads, hama, hama beads, Pumpkin, pumpkins, skeleton

Halloween Crafts – Post-it Note Pumpkin

October 16, 2018 by Penny Leave a Comment

I originally created the Post-it Note Pumpkin several years ago back on Being Mrs C. Time to revive it for this Halloween!

As Little Miss C and I sat at the kitchen table today crafting together with a bit of a halloween theme inspiration struck. Still on our patio windows were the letters that we put up when we reviewed Post-it Notes a few weeks back and as I looked at the orange and green colours I realised that I had the perfect materials to make a giant Post-it Note pumpkin.

Halloween Crafts Post It Note Pumpkin

What you need to make a Post-It Note Pumpkin

All you need to make this is:

  • Orange Post-It Notes*
  • Green Post-It Notes*
  • Black paper/card*
  • Glue* or double sided sticky tape*
  • A large wall or window space

How to make your Pumpkin

Halloween Crafts Post It Note Pumpkin

Arrange the orange Post-it Notes in a roughly round shape. You could make it a bit flatter at the bottom if you wish. Add some green Post-it Notes at the top to form a stalk.

Take your black paper / card and cut out three triangles (two for eyes and one for the nose) and a mouth shape. Use either glue or double sided sticky tape to attach them on to the orange Post-it Notes.

The Finished Pumpkin

Halloween Crafts Post It Note Pumpkin

Ta-da! One complete Post-it Note pumpkin.

If you’re feeling really clever you could try to create it in reverse so that it could go in a window and be seen from outside. I’m wondering about a smaller version for the square glass panel in our front door.

Happy Halloween!

Disclaimer: Links marked * are affiliate links. If you order anything via them it will cost you no more than if you’d gone to Amazon yourself to buy them, but I will receive a small commission. Many thanks for any purchases you make. They are very much appreciated in these tricky financial times. 

Filed Under: Childrens Crafts, Crafting, Halloween Tagged With: Childrens crafts, crafts, Halloween, halloween craft, KIds Crafts, post it notes, Pumpkin

Halloween Crafts – Paper Plate Spider’s Web

October 15, 2018 by Penny Leave a Comment

I first blogged about making a paper plate spider’s web as a Halloween craft over on Being Mrs C several years ago. Seeing as Halloween is approaching it seemed the right time to dust off the festive cobwebs and share it again.

Halloween Crafts Paper Plate Spiders Web

I saw a picture of this make on Pinterest (my favourite place online right now – please pop over and follow me if you don’t already) when doing some insect crafts with the kids earlier in the year and knew that it had to be on my Halloween list of things to make. The yarn in my Bostik Bloggers box from Craft Merrily was the perfect prompt. Paper plate spider’s webs are not only easy to make with young children, but they also look really effective and are great for children’s fine motor skills too.

Halloween Crafts Paper Plate Spiders Web

What do you need to make a paper plate spider’s web?

All you need is:

  • Paper plates
  • Scissors
  • Yarn / wool
  • Large tapestry needle (blunt if children are doing the activity)
  • Hole punch

How to make a paper plate spider’s web

Halloween Crafts Paper Plate Spiders Web

The first thing you need to do is cut out the middle of your paper plate. This can be a bit fiddly to start off with and you might need to fold the plate in half to start off your cutting, so it may be best for an adult to do this part.

Halloween Crafts Paper Plate Spiders Web

Once you’ve got just the rim of your plate left use the hole punch to make holes around the inside of it. Space them out a bit, but they don’t need to be very evenly spaced, nor does it matter how many you do. It seemed Little Miss C had never actually used a hole punch before so we now have piles of paper and paper plates all with holes punched in them as she enjoyed doing it so much!

Halloween Crafts Paper Plate Spiders Web

Thread the yarn on to the needle and start lacing it across the inside of the cut out plate. It doesn’t matter if you go in and out of holes you’ve already used, or what order you go round the holes, just try to make sure you’ve used all of them. Putting the needle in from the front or the back of the plate also doesn’t matter. This part of the activity is perfect for children – the holes are big enough for them to easily fit the needle through and it doesn’t matter at all as to what order they lace it all up in.

Try to finish by either going through the same hole where you started, or the one next to it and then just tie a not in the two ends of the thread to secure it.

Halloween Crafts Paper Plate Spiders Web

Finishing touches

These are perfect for hanging up as decorations for a Halloween party and would also work well with a small toy spider attached – as I’ve seen on Pinterest – but it seems that I just can’t find anywhere selling toy spiders this Halloween. I’ve searched all the local shops to no avail. I’ll keep my eyes out though as I think it would be the perfect addition.

Disclaimer: We were sent a box of craft goodies as part of our role on the Bostik Family Craft Bloggers Network when this blog post was first published. This post contains affiliate links.

Filed Under: Childrens Crafts, Crafting, Halloween Tagged With: Childrens crafts, craft, Crafting, Halloween, KIds Crafts, paper plate crafts, Spiders Web

Primary Sidebar

Google Ads

Categories

  • Baking
  • Blogging
  • Books
  • Business
  • Car Boot
  • Childrens Crafts
  • Collaboration
  • Corona Diary
  • Crafting
  • Crafts
  • Crochet
  • Days Out
  • Decorating
  • DIY
  • Environmental
  • Family
  • Fashion
  • Films
  • Finances
  • Fireworks
  • Food and drink
  • Gardening
  • Gifts
  • Halloween
  • Health and Fitness
  • Home
  • Interiors
  • Knitting
  • Life
  • Moving house
  • Music
  • New house
  • Outdoors
  • Parenting
  • Pregnancy
  • Relationships
  • Romance
  • Sewing
  • Simple things
  • Swimming
  • Television
  • Thrifty
  • Travel
  • Upcycling
  • Vintage
  • Womens Institute
  • Work

Penny on Amazon

Want to find out what I’m recommending over on Amazon at the moment? Take a look here.

Copyright © 2023 · Genesis Sample on Genesis Framework · WordPress · Log in